useReducer
useContext
Javascript
HTML and CSS
React.js
Start a Web Application with React
Quick Start: useReducer and useContext in your Template
1. Installation
Make sure to first follow the steps to run the project, then return to this reading. If you are using Codespaces, the project might already be running.
2. Add your first view
The app starts in main.jsx, where the global provider is defined. The routes are in the routes.jsx file, which organizes the application's navigation through react-router. You can read more about React Router here.
Open the routes.jsx file, where the routes are defined as:
1import { createBrowserRouter, createRoutesFromElements, Route } from "react-router-dom";
2import { Layout } from "./pages/Layout";
3import { Home } from "./pages/Home";
4import { Single } from "./pages/Single";
5import { Demo } from "./pages/Demo";
6
7export const router = createBrowserRouter(
8    createRoutesFromElements(
9        <Route path="/" element={<Layout />} errorElement={<h1>Not found!</h1>}>
10            <Route path="/" element={<Home />} />
11            <Route path="/single/:theId" element={<Single />} />
12            <Route path="/demo" element={<Demo />} />
13        </Route>
14    )
15);
As you can see, we have already added some routes like Home, Demo, and Single. These views are useful examples of the most common things you might need in a project.
3. Code your first HTML view
As you can see, the page /pages/Demo.jsx is a React component that accesses the global state and dispatches actions:
1import useGlobalReducer from "../hooks/useGlobalReducer";
2
3export const Demo = () => {
4  const { store, dispatch } = useGlobalReducer();
5
6  return (
7    <ul>
8      {store.todos.map(todo => (
9        <li key={todo.id} style={{ background: todo.background }}>
10          {todo.title}
11          <button onClick={() => dispatch({
12            type: 'add_task',
13            payload: { id: todo.id, color: '#ffa500' }
14          })}>
15            Change color
16          </button>
17        </li>
18      ))}
19    </ul>
20  );
21};
Some key points you might notice from this view are:
- The component returns HTML.
- At the beginning of the component file (
Demo.js),useGlobalReduceris imported, which will be used to handle any global information needed from other views or the application. - It is also important to mention that
useGlobalReduceris called within the component, in the first few lines:
1const { store, dispatch } = useGlobalReducer();
4. Add styles to components
Save styles in the index.css file or create CSS files per component.
Example (src/styles/demo.css):
1.orange-bg {
2  background-color: #ffa500;
3}
Import in Demo.jsx:
1import "../styles/demo.css";
5. Create your first reusable component
Create ./components/Card.jsx:
1export const Card = ({ title, subtitle }) => (
2  <div className="card">
3    <h5>{title}</h5>
4    <h6>{subtitle}</h6>
5  </div>
6);
Use it in Home.jsx:
1import { Card } from "../components/Card";
2
3export const Home = () => (
4  <Card title="Hello" subtitle="Welcome to Home" />
5);
6. Using context (useGlobalReducer)
useGlobalReducer gets store and dispatch from the global context defined in src/hooks/useGlobalReducer.jsx, connecting with the state management system in src/store.js.
🟡 How to use it?
In your components, import and use the useGlobalReducer hook to access the state (store) and update it via dispatch.
📌 Example in Demo.jsx:
1import useGlobalReducer from "../hooks/useGlobalReducer";
2
3export const Demo = () => {
4  const { store, dispatch } = useGlobalReducer();
5
6  const changeColor = (id) => {
7    dispatch({
8      type: 'add_task',
9      payload: { id, color: '#ffa500' }
10    });
11  };
12
13  return (
14    <ul>
15      {store.todos.map(todo => (
16        <li key={todo.id} style={{ background: todo.background }}>
17          {todo.title}
18          <button onClick={() => changeColor(todo.id)}>
19            Change color
20          </button>
21        </li>
22      ))}
23    </ul>
24  );
25};
How actions work (store.js):
The global state is stored and managed in src/store.js through a reducer and an initial state defined in initialStore.
Initial state (initialStore):
1export const initialStore = () => {
2  return {
3    message: null,
4    todos: [
5      { id: 1, title: "Make the bed", background: null },
6      { id: 2, title: "Do my homework", background: null }
7    ]
8  };
9};
The initial state contains a message and a list of tasks (todos), each with an id, title, and background.
Reducer (storeReducer):
When dispatch is executed, the action is received by the reducer in src/store.js, which updates the state according to the type:
1case 'add_task':
2  return {
3    ...store,
4    todos: store.todos.map(todo =>
5      todo.id === action.payload.id
6        ? { ...todo, background: action.payload.color }
7        : todo
8    )
9  };
With this structure (initialStore and storeReducer), your application maintains a centralized and scalable global state.
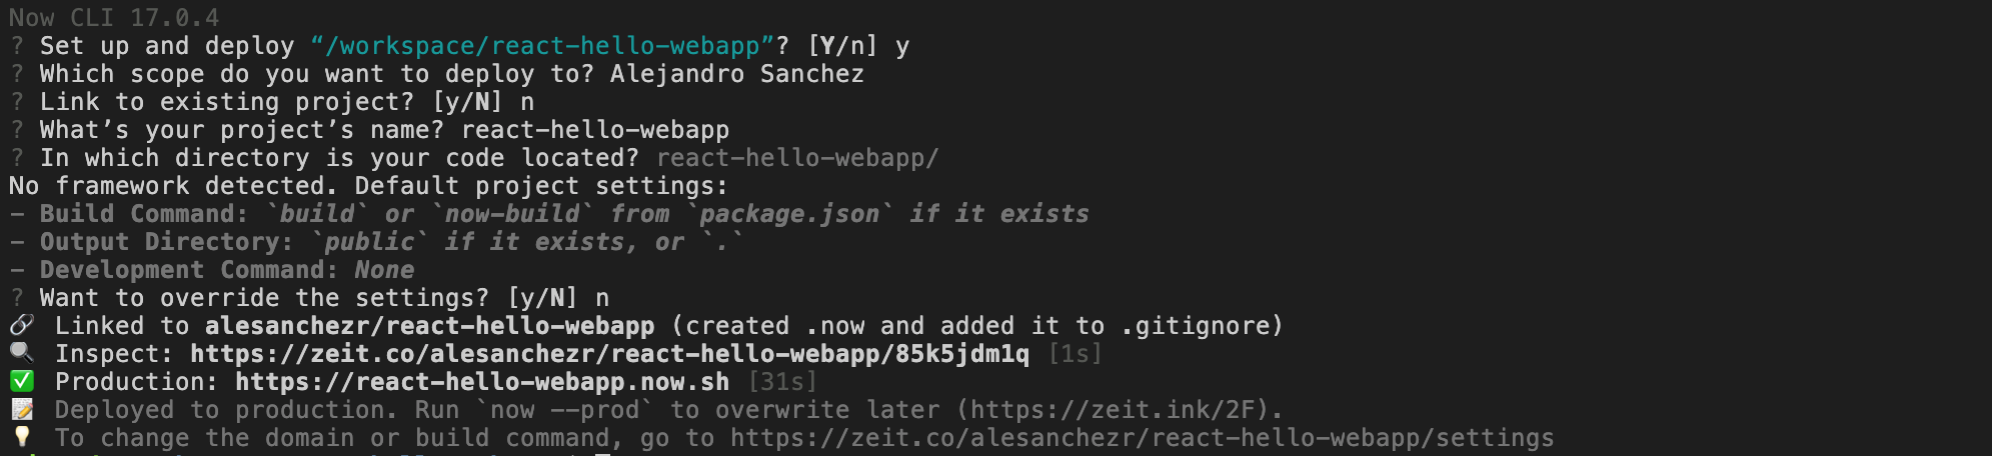
Publish your website!
- Vercel: The recommended FREE hosting provider is vercel.com, you can deploy in 1 minute by typing the following 2 commands:
Log in (you need to have an account):
1$ npm i vercel -g && vercel login
Deploy:
1$ vercel --prod
✎ Note: If you don't have an account, just go to vercel.com, create an account, and come back here.