React Hooks Explained
Why hooks?
Functional components passing props are amazing because they are simple, perform fast, and require little code, but they can lead to the much dreaded "wrapper hell" in the quest for maintaining encapsulated components. On the other hand, class components are often confusing to work with for both humans and machines, they often lack a positive developer experience, which makes it more difficult to create a more positive user experience as well. Hooks provide a way for us to use state and lifecycle methods with minimal code, like giving your components superpowers!
Do my components need superpowers?
In general, using props is enough to create an amazing component, but sometimes you need more. Here are some really useful examples to know when to use hooks:
- If you want to open or close a modal or dialog, use the useState hook.
- If you want to fetch some data only at the beginning of the program execution, use the useEffect hook.
- If you want to share information within all components, use the useContext hook. We will talk more about the useContext hook in a separate lesson.
Through experience, you will learn when to use a hook. If you don't think you need them, DON'T use them! The less, the better.
Most applications need at least one useState and one useEffect
To make use of hooks, we MUST FIRST IMPORT them at the beginning of our file. For example, if we need useState, we would do:
1import React, { useState } from 'react';
And if we want to use useEffect as well, we can include this:
1import React, { useState, useEffect } from 'react';
Now let's learn how to use them :)
The useState react hook:
1//       variable name      setter name               initial value (any value)
2const [superVariable, setSuperVariable ] = useState(          null        );
Basically, superVariable will be initialized with null, and then you will be able to re-set its value by calling setSuperVariable like this:
1// Here we are re-setting the value of superVariable = 'hello' when the user clicks on a button:
2<button onClick={() => setSuperVariable('hello')}></button>
Possible uses for the useState hook
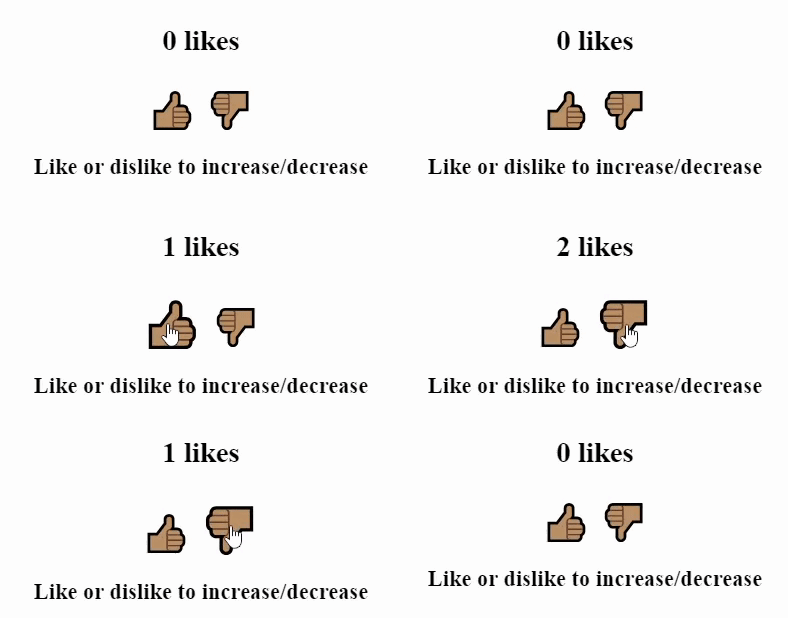
- Counting: Displaying the number of likes on the screen and being able to increase or decrease when the user clicks.
1import React, { useState } from "react";
2import ReactDOM from "react-dom";
3import "./styles.css";
4
5const Counter = () => {
6  // Initilize a 'count' variable at 0, the 'setCount' function will be used to re-set the 'count' value.
7  const [count, setCount] = useState(0);
8  return (
9    <div>
10      <h2>{count} likes</h2>
11      {/* Re-set count to its previous value + 1 */}
12      <span onClick={() => setCount(count + 1)}>👍🏽</span>
13      {/* Re-set count to its previous value - 1 */}
14      <span onClick={() => setCount(count - 1)}>👎🏽</span>
15      <h3>Like or dislike to increase/decrease</h3>
16    </div>
17  );
18};
19
20ReactDOM.render(<Counter />, document.getElementById("root"));
- Timer/Clock: You can use the system time to show the current time on the screen, but since time changes all the time, we store it with a state variable.
1import React, { useEffect, useState } from "react";
2
3const Clock = (props) => {
4  const [time, setTime] = useState(new Date().toLocaleTimeString());
5
6  useEffect(() => {
7    const interval = setInterval(() => {
8      setTime(new Date().toLocaleTimeString());
9    }, 1000);
10    return () => clearInterval(interval);
11  }, []);
12
13  return (
14    <div>
15      <h1>{time}</h1>
16    </div>
17  );
18};
19
20export default Clock;
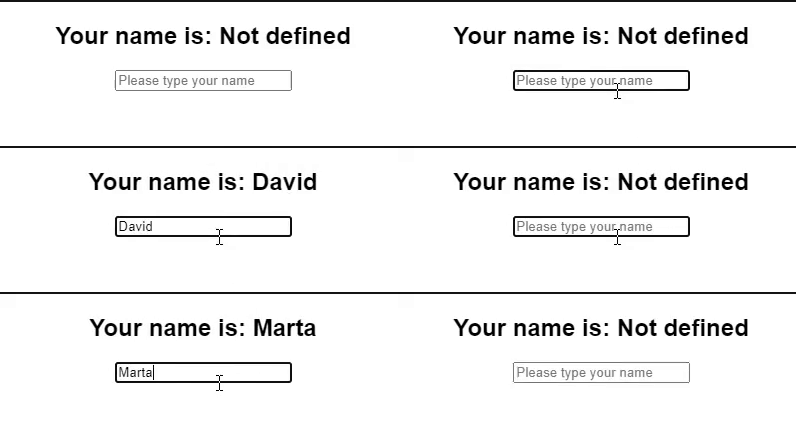
- Showing an input on the screen: The best practice to get the content from any input is by storing it on a state variable, this is called "Controlled Input".
1import React, { useEffect, useState } from "react";
2
3const ControlledInputForm = (props) => {
4  //     Holds the value of the input
5  const [currentValue, setValue] = useState("");
6  return (
7    <div>
8      <h2>Your name is: {currentValue ? currentValue : "Not defined"}</h2>
9
10      {/*
11       This is a controlled input because its value is in sync
12       with the stated variable currentValue
13     */}
14      <input
15        type="text"
16        onChange={(e) => setValue(e.target.value)}
17        value={currentValue}
18        placeholder="Please type your name"
19      />
20    </div>
21  );
22};
23
24export default ControlledInputForm;
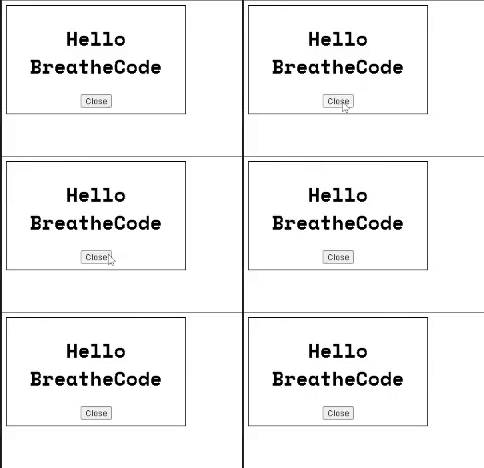
- Opening/Closing (show/hide): A typical use case is having a dialog that asks a question or allows a user to sign up for a newsletter.
1import React, { useState } from "react";
2import ReactDOM from "react-dom";
3import "./styles.css";
4
5const Modal = () => {
6  {/**
7   *  Using the useState hook, you have to pay attention to 3 elements:
8   * - opened: a variable that will change over time (can have any name)
9   * - setOpened: a function that resets the value of "opened" (should have the word "set" before the name of the variable)
10   * - useState: this is the hook, it has to be useState and it receives the initial value for "opened"
11   */}
12  const [opened, setOpened] = useState(true);
13
14  {/* if opened === true, I show the modal, else I show the button to open the modal */}
15  return opened ? (
16    <div>
17      <h1>Hello BreatheCode</h1>
18      <button type="button" onClick={() => setOpened(false)}>
19        Close
20      </button>
21    </div>
22  ) : (
23    <button type="button" onClick={() => setOpened(true)}>
24      Open
25    </button>
26  );
27};
28
29ReactDOM.render(<Modal />, document.getElementById("root"));
30
- Thousands of other possible applications.
Let's explain this hook with a small Modal window example. Here is the live code:
To implement a "Modal Window" we decided to create a hooked variable called opened that is true if the modal window is shown to the user.
If the user clicks on "close", we simply use the hook function setOpened to change the value of opened to false.
The useEffect react hook:
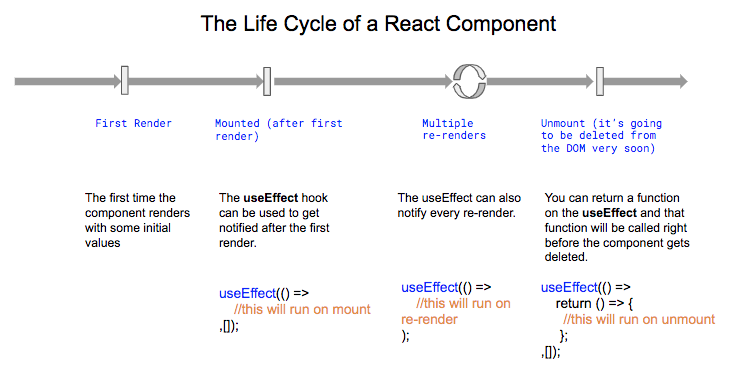
useEffect is another amazing hook that you will use if you want to execute some code after the component renders, for example:
1) After the component renders for the first time (like the good old componentDidMount)
1const MyComponent = () => {
2    useEffect(() => {
3
4        // Whatever you code here will execute only after the first time the component renders
5
6 }, []); // <------ PLEASE NOTICE THE EMPTY ARRAY
7
8    return <div>Some HTML</div>;
9}
☝ Please notice the
[]as the second parameter of the useEffect.
2) Every time (or sometimes) after the component re-renders
1const MyComponent = () => {
2    useEffect(() => {
3        // This will run every time the component re-renders
4        if (some_condition) {
5            // This will run only if some_condition is true
6        }
7    }); // <------ PLEASE NOTICE THE EMPTY ARRAY IS GONE!
8
9    return <div>Some HTML</div>;
10}
☝ This useEffect does not have an empty array
[]as a second parameter.
3) When the component will unmount or stop being rendered (like the good old componentWillUnmount function used by class components)
1const MyComponent = () => {
2    useEffect(() => {
3        // This will run only the first time the component renders
4        return () => {
5            // This will run only right before the component unmounts
6        }
7    }, []); // <------ PLEASE NOTICE THE EMPTY ARRAY
8
9    return <div>Some HTML</div>;
10}
Building a Todo List Using only useState and useEffect react Hooks
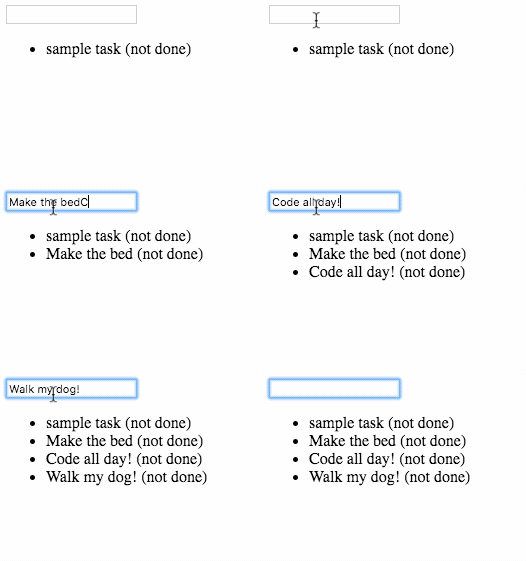
For example, let's say I'm building a todo list, and I have to load the list of tasks from an API. I will have to fetch the information right after the component renders for the first time:
1const Todos = (props) => {
2    // Initialize the "tasks" variable to an empty array and hook it to setTasks function
3    const [ tasks, setTasks ] = useState([]);
4
5  // This function encapsulates the logic of fetching the todo list
6  // and creating a new one if the list doesn't exists
7  const fetchList = async () => {
8    const endpoint = "https://playground.4geeks.com/todo/users/demo";
9    let response = await fetch(endpoint);
10    if (response.ok) {
11      // If the list is fetched, the task gets loaded with the todos
12      let data = await response.json();
13      setTasks(data.todos);
14      return response.status;
15    }
16    if (response.status == 404) {
17      // If the list is not found, it must be created with a POST request
18      let newList = await fetch(endpoint, { method: "POST" });
19      if (newList.ok) setTaks([]);
20    }
21  };
22
23  //this function useEffect will run only one time, when the component is finally lodaded the first time.
24  useEffect(() => {
25      // here I fetch my todos from the API
26      fetchList();
27    },[] // <---- thanks to this empty array the use effect will be called only once
28  );
29      return <ul>{tasks.map((t, index) => <li key={index}>{t.label}</li>)}</ul>;
30}
31
☝ Review the code in depth and check the live demo by clicking here.
Further Reading
For more information, check out: Official React Documentation, also how to build your own hooks.


