Network Services
Network Interface Configuration
The network interface and its configuration are some of the most important parts of a server and the tasks of a systems administrator, as with the network interface, we can establish connectivity and allow the server to communicate with other devices on the network.
To establish a connection with other devices, the first thing we need to do is assign an IP to our server, either statically where we assign the IP and add it manually, or dynamically where we let a DHCP server assign a temporary IP address.
The choice between a dynamic or static IP address for a server depends on several specific factors and requirements. Here are some considerations that can help you make an informed decision:
- Stability and availability: If you need your server to be always available and accessible, a static IP address might be more suitable. The server's address will not change with a static IP address, making connection and constant access easier.
- Services and applications: If your server hosts services or applications that require a constant IP address, such as web servers, databases, or email servers, a static IP address is recommended. This ensures that clients and users can always access your services using the same IP address.
- Security: A static IP address can facilitate the implementation of security measures, such as IP address filtering or configuring specific firewall rules. This can help protect your server and the services it offers.
- Flexibility and mobility: If you need flexibility to change the physical location of your server or if your Internet service provider (ISP) requires the use of dynamic IP addresses, a dynamic IP address may be more convenient. Dynamic IP addresses are automatically assigned and can change over time.
After these considerations, we can indicate that the best IP configuration is static for our server. To achieve this configuration, we perform the following steps.
We use the ifconfig command to know which is our network interface.
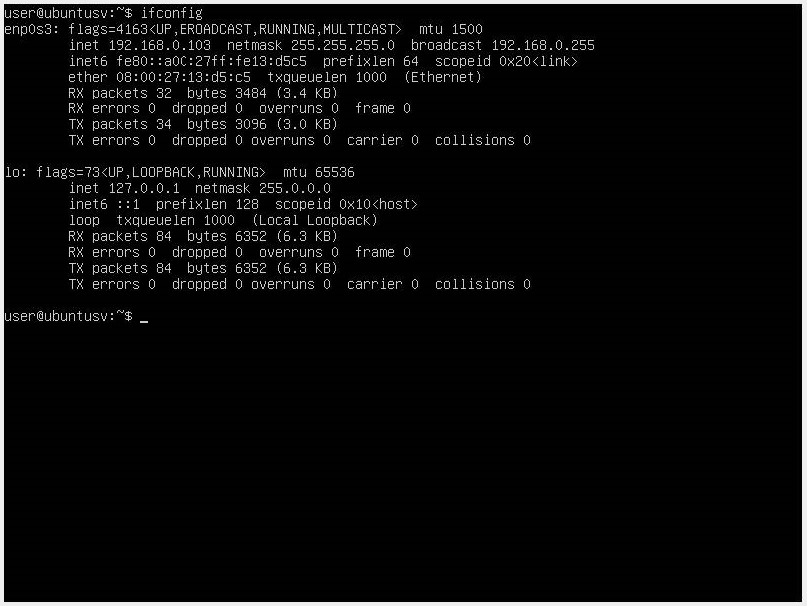
We can identify it as the first interface we have from the result “enp0s3”.
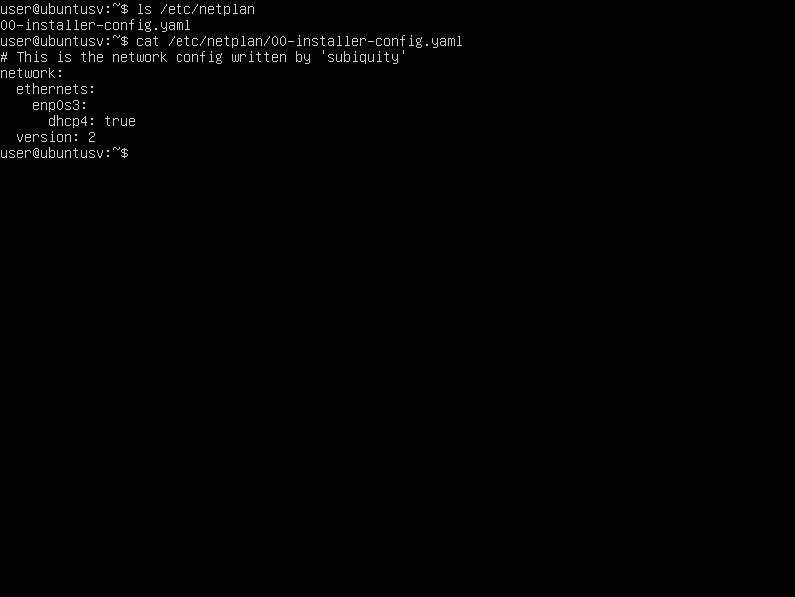
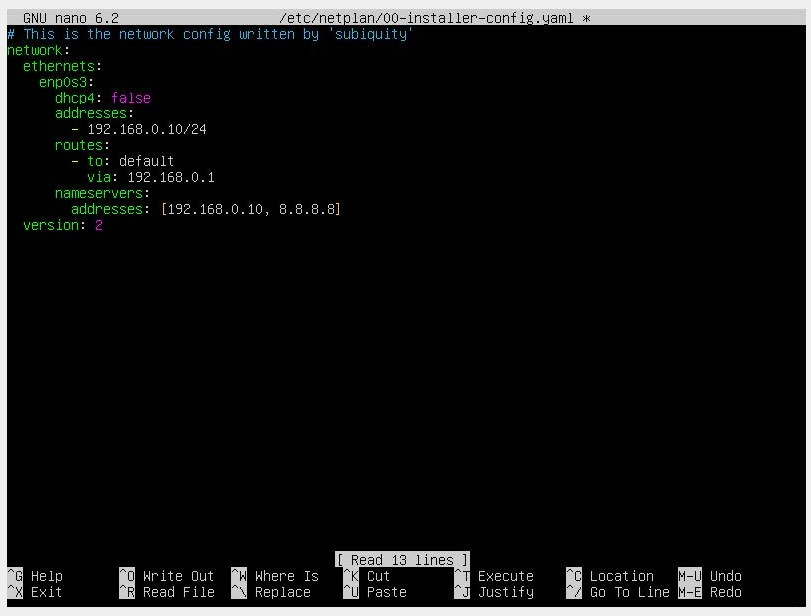
Generally, network interfaces were configured through the /etc/network/interfaces file in Debian distributions. In Ubuntu, since version 17.10, the network interface configurations have changed to the netplan utility, which generates a YAML file to facilitate network configurations. We will access this file with a code editor at the path /etc/netplan/00-installer-config-yaml.

Assign a 192.168.1.10 IP to our server and the rest of the configurations.
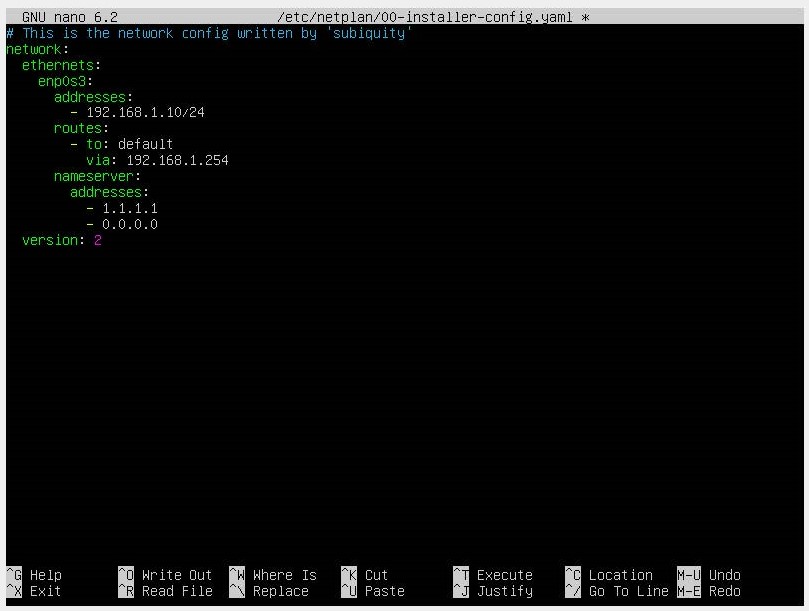
Once the values are assigned, we apply the command.
netplan apply

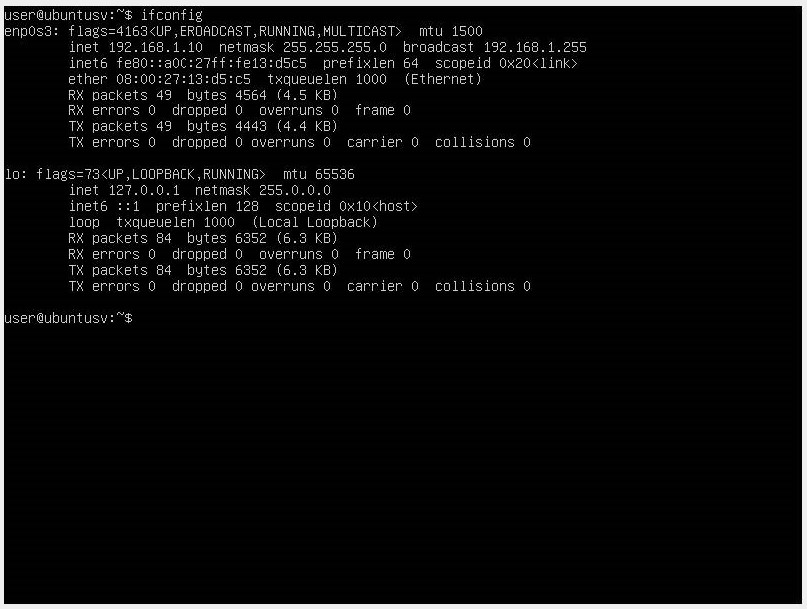
We check that our IP is the one we assigned and that's it, we have our server's network interface configured.
Name Resolution (DNS) Configuration
Another essential configuration for network connection is DNS (Domain Name System) configuration. Remember that this protocol is responsible for translating the domain names we use in our browser, such as www.google.com, into the IP addresses of the web servers we want to access.
This process occurs when we enter a web address in our browser, which sends a request to a DNS service to obtain the IP address associated with that domain name. The DNS server searches its database and returns the corresponding IP address, allowing the browser to establish a connection with the web server hosting the site.
In addition to its primary function of domain name translation, DNS also plays an important role in navigation security and optimization. For example, DNS can implement security measures, such as filtering malicious content or detecting fraudulent websites, helping protect users from potential online threats.
It's important to have the DNS of our server configured as it will allow users to access the services and applications hosted on the server using domain names. It is also used to redirect traffic to different servers based on load or availability, allowing for load balancing among several servers and ensuring optimal performance.
DNS also plays an important role in server security by implementing security measures in the DNS configuration, such as filtering malicious content or detecting fraudulent websites, protecting the server and users from potential online threats.
To configure the DNS of our Ubuntu server, we will repeat the same process we did when configuring our static IP by accessing the path /etc/netplan/00-installer-config.yaml from a code editor.
According to the netplan documentation, the way to add our DNS is through the value
nameservers:
Since we are working with a server, the primary DNS we will use will be the same IP of our server, and the alternative will be a public DNS.
Here is a list of public DNS that you can use for the network:
| DNS Name | Primary IP | Alternative IP |
|---|---|---|
| Cloudflare | 1.1.1.1 | 1.0.0.1 |
| OpenDNS | 208.67.222.222 | 208.67.220.220 |
| 8.8.8.8 | 8.8.4.4 |
For this configuration, we will use Google DNS.
Once the YAML file is edited, we apply the netplan apply command.
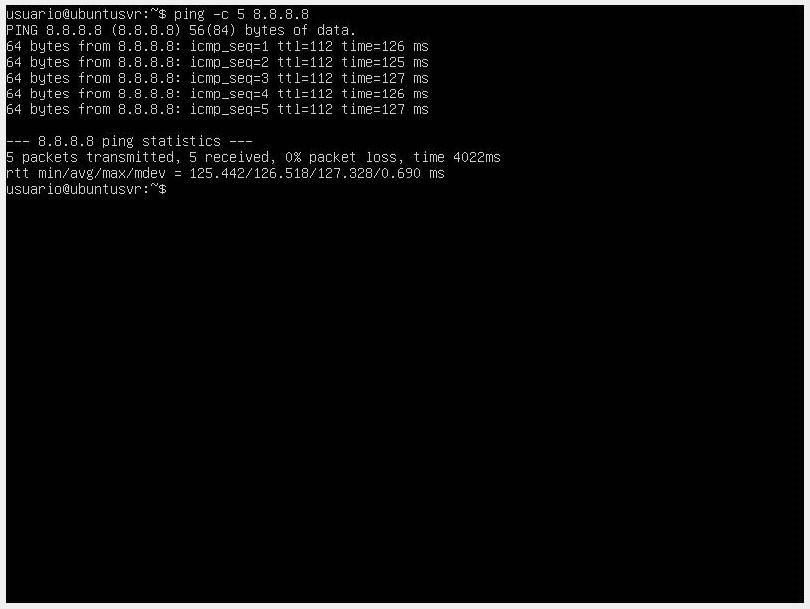
If we want to verify that we have a connection, we use the ping command along with our alternative server.
Network Services Configuration
When we talk about network services, we refer to the applications that run in the background, enabling certain capabilities when needed. These applications are fundamental components that allow communication and information exchange on a network.
One of the most common network services on Linux servers is the web server, which allows hosting and delivering web pages through the HTTP protocol. The most popular web server on Linux is Apache, although there are other options like Nginx. These web servers allow users to access websites and online applications, providing a smooth and secure browsing experience.
Let's configure our HTTP server with Apache by following these steps:
-
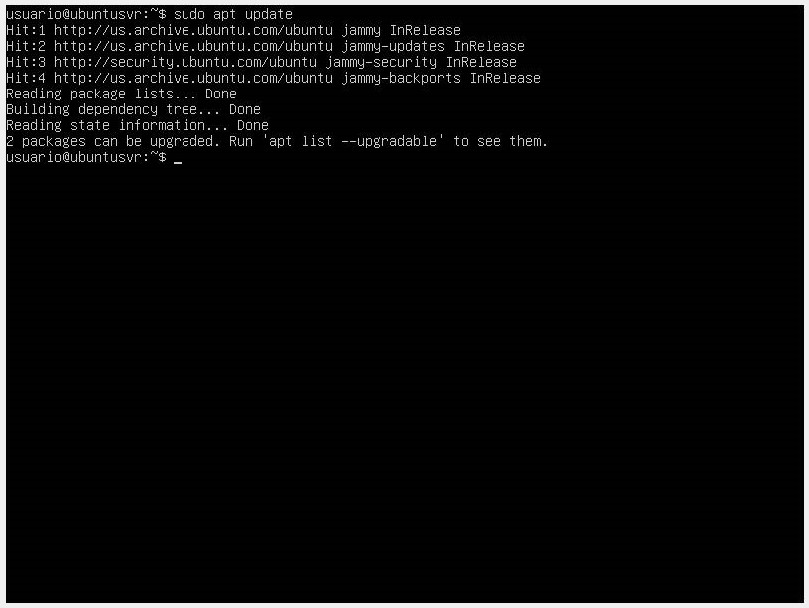
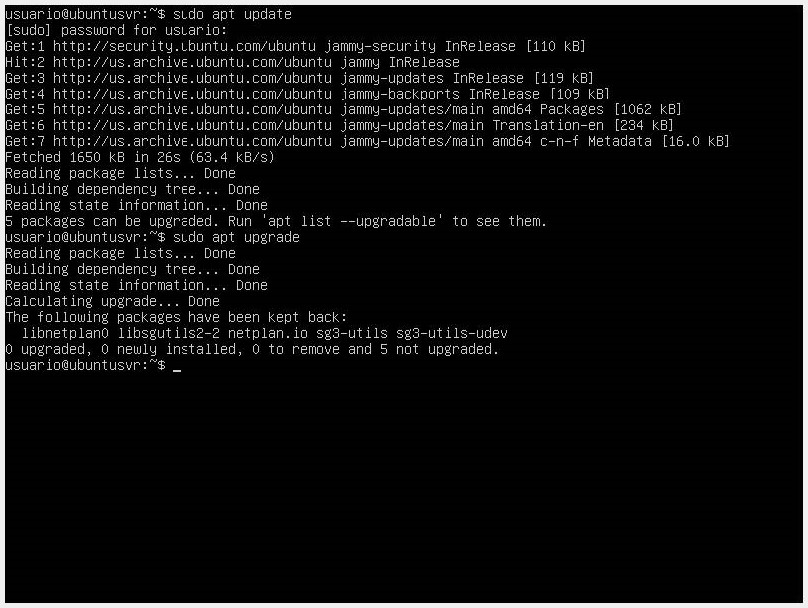
We install Apache after updating the local packages with sudo apt update.
-
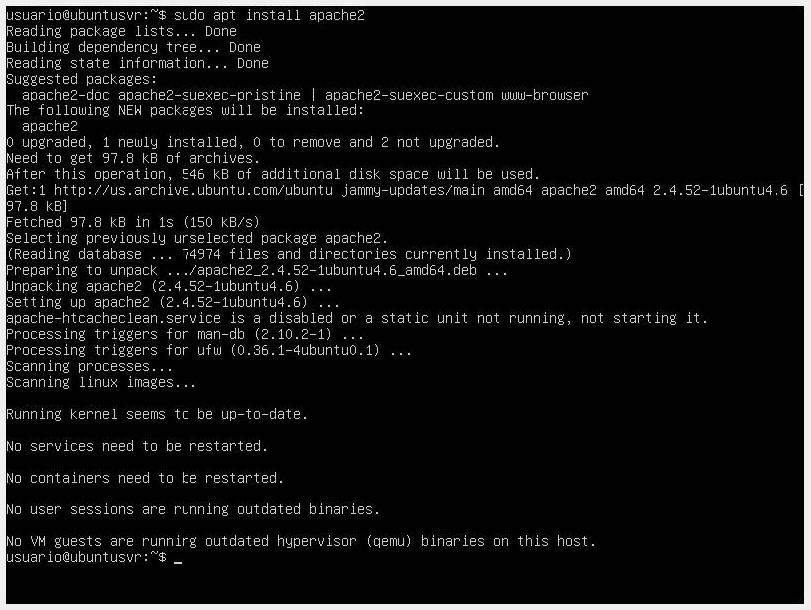
Once the packages are updated, we install our Apache server with sudo apt install apache2.
-
Before testing Apache, it's necessary to modify some firewall settings to allow external access to the default web ports. During installation, Apache registers with UFW to provide some application profiles that can be used to enable or disable access to Apache through the firewall.
-
With the command sudo ufw app list, we will have a list of application profiles.
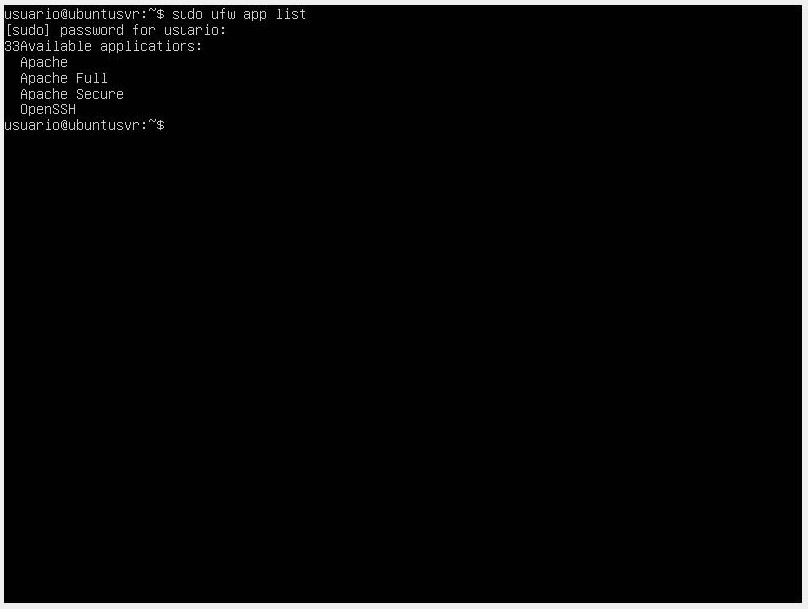
The result will have three profiles available for Apache:
- **Apache**: This profile opens only port 80 (normal, unencrypted web traffic).
- **Apache Full**: This profile opens port 80 (normal, unencrypted web traffic) and port 443 (encrypted TLS/SSL traffic).
- **Apache Secure**: This profile opens only port 443 (encrypted TLS/SSL traffic).
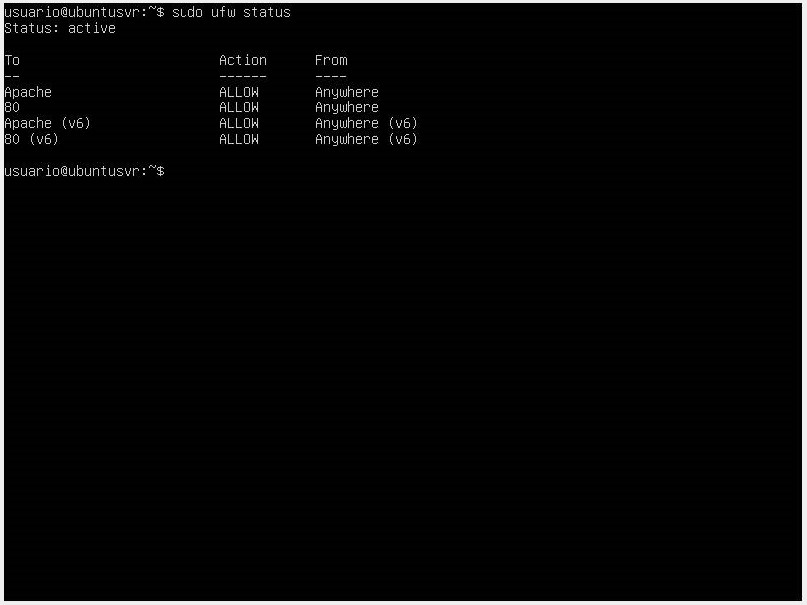
- We enable the most restrictive profile, which would be Apache, allowing traffic on port 80 (http port).
sudo ufw allow “Apache”

We can verify the changes using the sudo ufw status command.
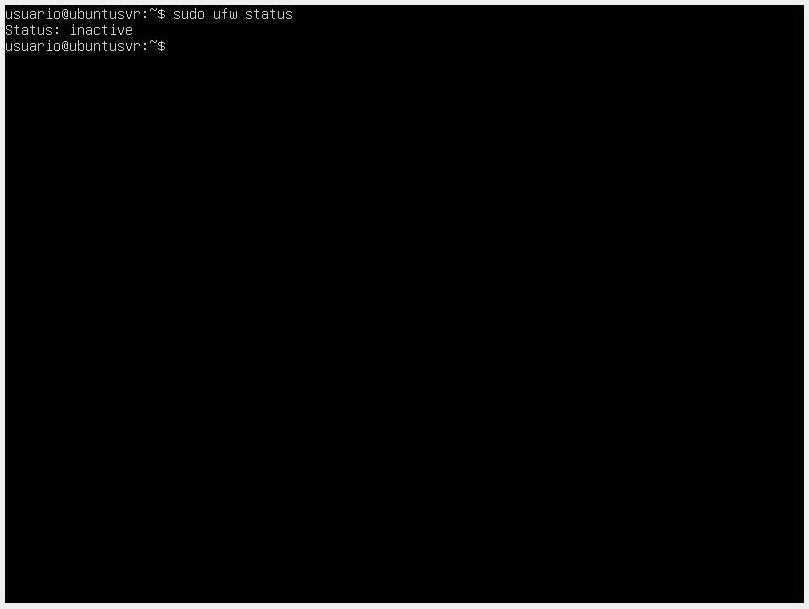
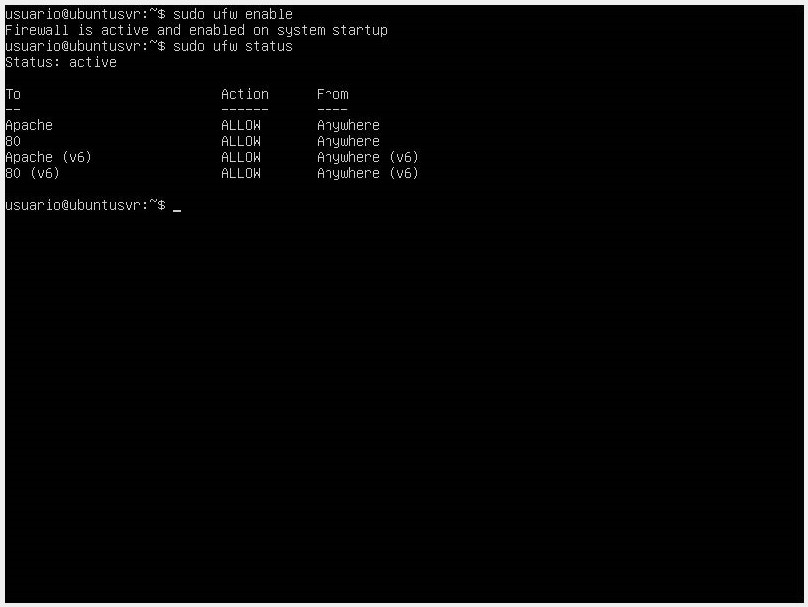
In some cases, we may get a Status: Inactive response. This happens because the firewall is inactive. To activate it, we use the sudo ufw enable command and check the status again.
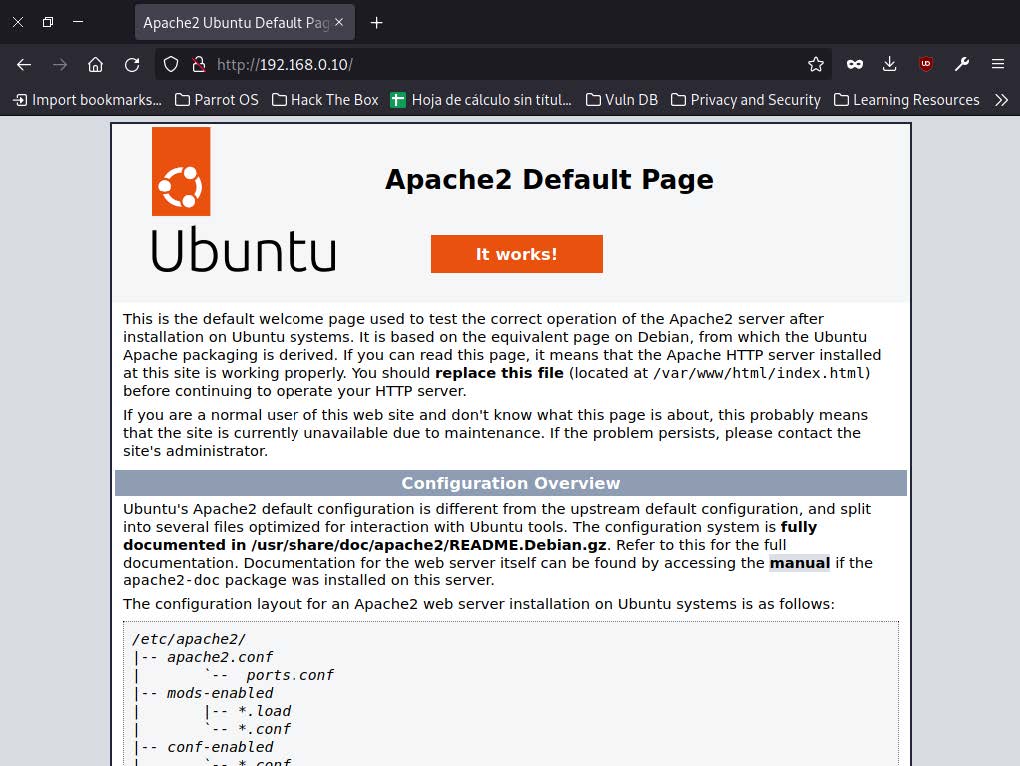
- Once we have allowed traffic to the HTTP port, we check the status of our server with the sudo systemctl status apache2 command.

We can see that its status is active and running.
- Another way to check that our server is active is by making a page request. If we are not sure of the IP address of our server, we use the hostname -I command, which will return the IP that we will open in a web browser to verify it is active.

Another necessary service for our server is FTP (File Transfer Protocol), which we use as a means to send and receive files over a network connection using a client/server framework and SSL/TLS security that allows users to share files and receive from remote computers through secure, efficient, and reliable data transfer.
FTP works the same way as HTTP (HyperText Transfer Protocol) or SMTP (Simple Mail Transfer Protocol). The difference is that FTP is responsible for transporting files over the Internet, while HTTP and SMTP handle web pages and emails, respectively.
To install this service on our server, we can follow these steps:
- Before installing our service, it is recommended to update our operating system with sudo apt update and sudo apt upgrade.
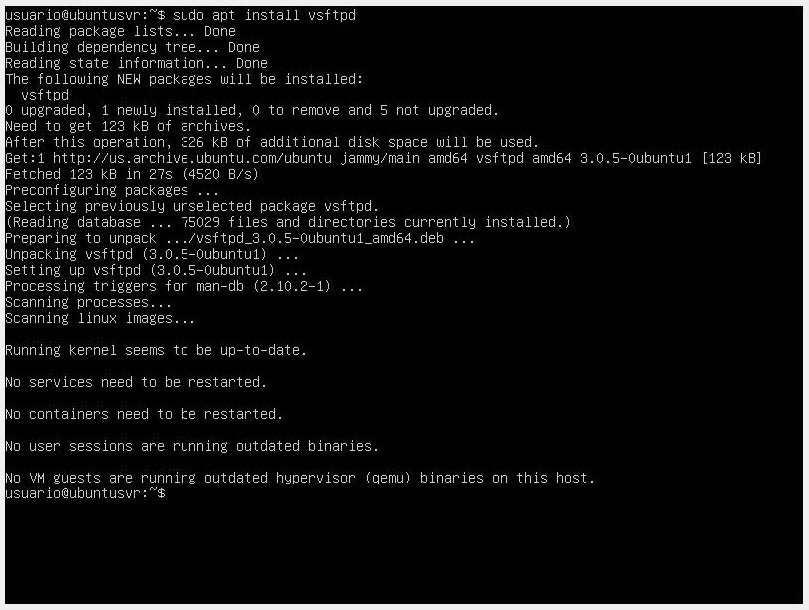
- We proceed to install vsftpd (Very Secure FTP Daemon), which is an FTP server for Unix-like systems, including Linux. We do this with the command sudo apt install vsftpd.
- Once the installation is complete, we will need to edit the configuration file. It is recommended in these cases to create a backup of the original file to start with a blank configuration if we make any mistakes.

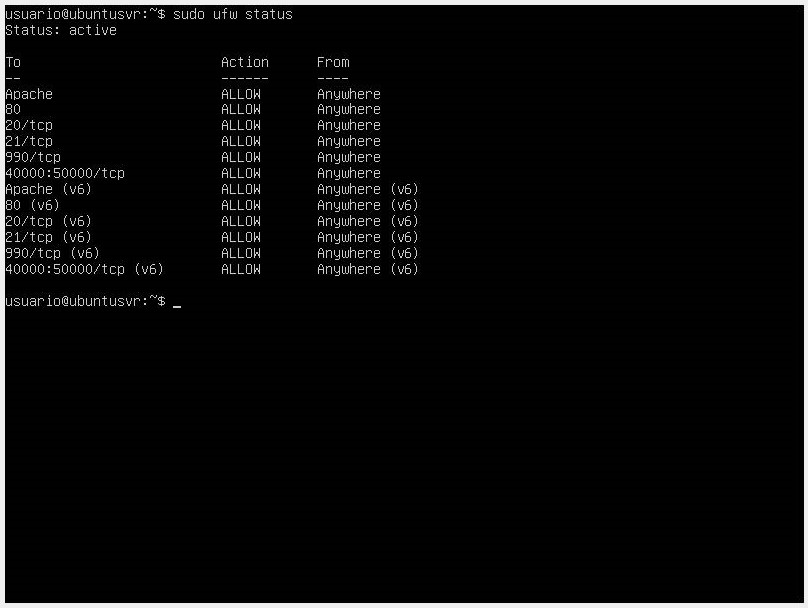
- Once the copy is created, we start by allowing FTP traffic from the firewall using the following commands:
sudo ufw allow 20/tcp
sudo ufw allow 21/tcp
sudo ufw allow 990/tcp
sudo ufw allow 40000:50000/tcp
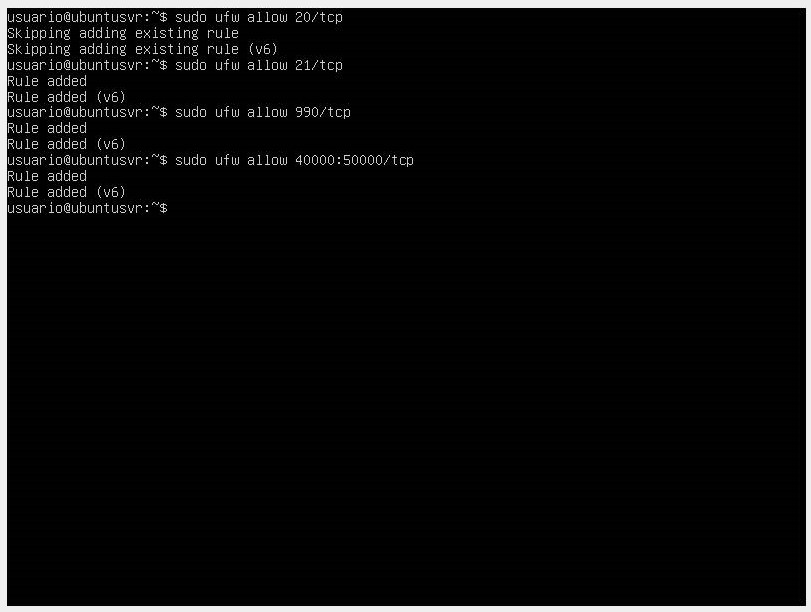
These commands will open several ports:
- OpenSSH is necessary if you still want to access your server via SSH. Sometimes, this option is enabled by default.
- Ports 20 and 21 for FTP traffic.
- Ports 40000:50000 will be reserved for the passive port range to be established in the configuration file.
- Port 990 will be used when TLS is enabled.
Once the rules are added, we check the firewall status.
-
We open the /etc/vsftpd.conf file with the code editor of our choice and enable the option write_enable=yes by removing the #.
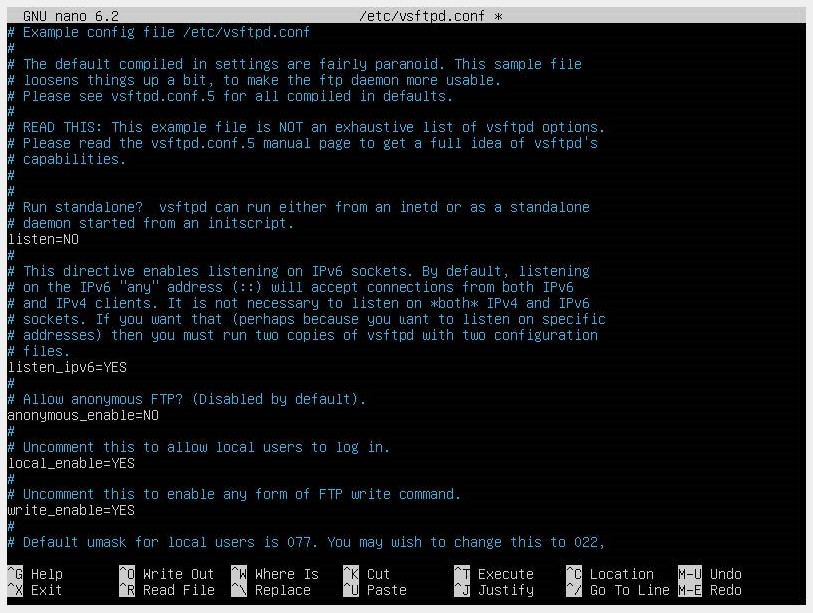
-
We add some new values at the end of the file. First, a user_sub_token will be added to the local_root directory path. This will allow the configuration to work with the current user and any other users that are added later:
- user_sub_token=$USER
- local_root=/home/$USER/ftp

-
To ensure there are a considerable number of connections available, we will limit the number of ports used in the configuration file:
- pasv_min_port=40000
- pasv_max_port=50000
-
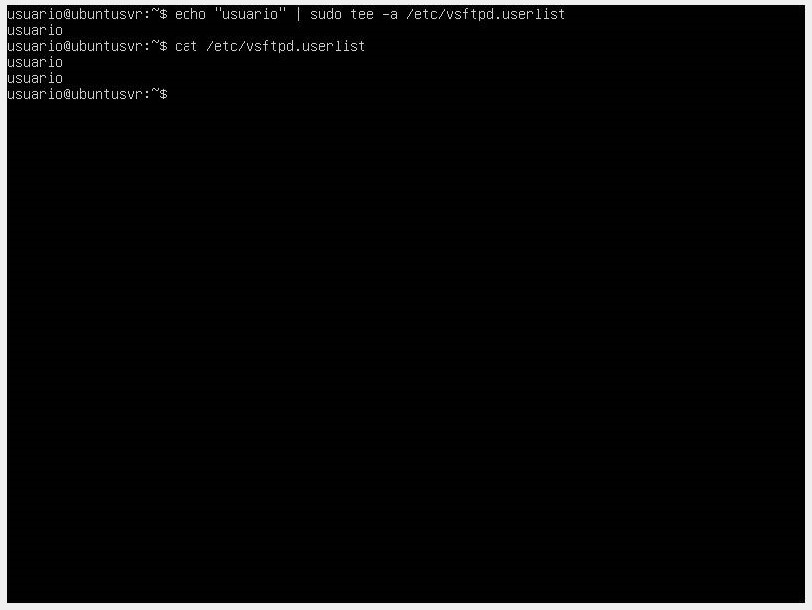
Once these changes are made, we close the file and add our user to the FTP service user list and check that it is added properly.
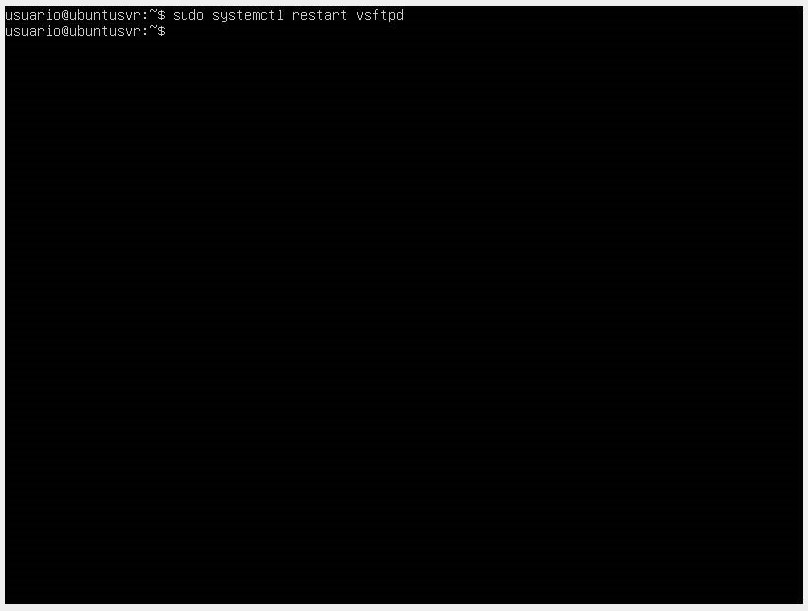
- Finally, we restart the vsftpd service.
📖 In this module, we have learned how to configure two very important services for managing a server, such as HTTP and FTP. There are many others that you can research and practice within your virtual machine. Go ahead, practice makes perfect.