Render.com
Flask
Machine Learning
Deploy AI Models Using Flask and Render.com
Deployment in Render using Flask
After the model development phase, we will have a model that meets our expectations and satisfies our needs. For this model to be useful and fulfill the function for which it has been trained, we must make it available in an environment that allows us to use it. Here we propose a free environment called Render, but it can be transferred to other environments, free or paid.
Render
Render is a cloud computing platform that facilitates the deployment, hosting and execution of applications, databases, scheduled tasks and other services. It is often described as an easy-to-use platform that combines the ease of platforms like Heroku with the power and flexibility of more traditional cloud providers like AWS.
Some key features and offerings of Render include:
- Web application deployment: Render allows you to deploy web applications in various languages and frameworks, including Node.js, Ruby on Rails, Django and many others.
- Private services: These are applications or jobs that are not exposed to the Internet but can be used by other applications in Render.
- Scheduled tasks: Allows executing periodic jobs, similar to Cron jobs (a utility used for scheduling tasks) in Unix systems.
- Databases: Render supports the deployment of databases such as PostgreSQL and offers a persistent storage solution for data.
- Deployment from repositories: You can connect your GitHub or GitLab repository and configure automatic deployments every time you push to your repository.
Render has earned a positive reputation for being an attractive option for developers and startups looking for a quick and easy way to deploy and scale applications without the administrative overhead of more traditional solutions.
Registration on the platform
In order to access Render you must have an account. To register, you must access the following link. Once you have an account, you will have access to all the Render functionality:
We can create database services, web deployment services, scheduled tasks...
Integration in Render
In this lesson, we will integrate the classification model we have developed in the decision trees module.
The decision_tree_classifier_default_42.sav model has been saved in a Pickle object so that it can be used, for example, to deploy it in a web service like this case.
Step 1: Create a Git repository
To integrate something into Render, we must first have to create a Git repository. The Git we are going to generate in this lesson can be found here, which is derived from 4Geeks' Machine Learning Template.
Step 2: Create a basic application
We will now generate a simple application using the Flask library. In the src directory, we create a new file named app.py which we will modify with the following code:
1from flask import Flask
2app = Flask(__name__)
3
4@app.route("/")
5def hello_world():
6    return "Hello, World!"
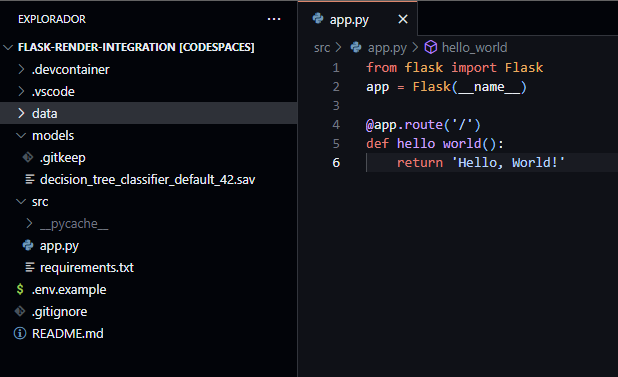
The created file will serve as a minimal example of how to handle HTTP requests. It imports the Flask object and creates a function that returns an HTTP response.
Right now, the repository looks like this:
Step 3: Run the application
To run the application locally, we need the Python library gunicorn. We just need to install it, access it with the console to the directory where the script is located and run gunicorn app:app.

When finished, an address will be available through which we can access the web application:
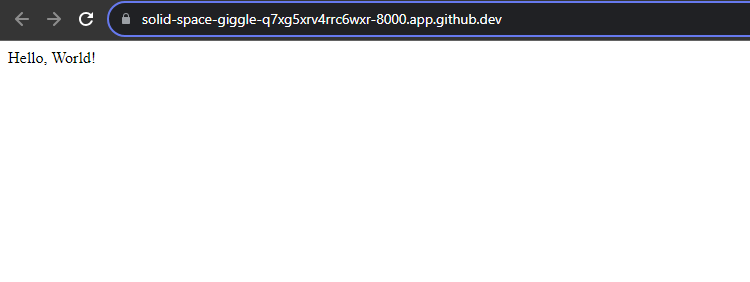
In this case, as we are developing it in a Codespace, the link is different from the one that would be generated locally, which would be http://127.0.0.1:8000.
At this point, we have a small Flask web application with little or no functionality. Next, we will add HTML files to customize the application.
Step 4: Implementing the application web interface
As we mentioned at the beginning of the lesson, we want to integrate the decision tree trained for the Iris dataset from the Machine Learning UCI repository. This dataset has 4 predictor variables: petal width (petal width (cm)), petal length (petal length (cm)), sepal width (sepal width (cm)) and sepal length (sepal length (cm)).
We will create an HTML that allows us to enter a value for each variable in order to carry out the prediction:
1<!DOCTYPE html>
2<html>
3<head>
4    <title>Iris - Model prediction</title>
5</head>
6<body>
7    <h2>Introduce the values</h2>
8
9    <form action="/" method="post">
10        Petal width: <input type="number" step="any" name="val1" required><br><br>
11        Petal length: <input type="number" step="any" name="val2" required><br><br>
12        Sepal width: <input type="number" step="any" name="val3" required><br><br>
13        Sepal length: <input type="number" step="any" name="val4" required><br><br>
14        <input type="submit" value="Predict">
15    </form>
16
17    {% if prediction != None %}
18        <h3>Prediction: {{ prediction }}</h3>
19    {% endif %}
20</body>
21</html>
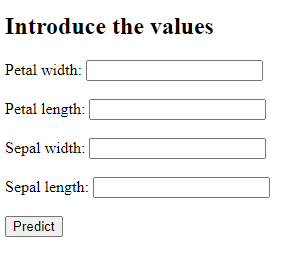
This HTML contains a title and a form in which the values associated with each field must be entered. Then, by clicking on the Predict button, an element containing the prediction of the model will appear, depending on the values entered. In the HTML there are some sentences between braces that are pure Python code, a curious syntax used by Flask to enter values dynamically.
All the HTML templates that we generate must go in a templates folder that must be created at the same level as the app.py. We call this file index.html and store it in the folder.
In addition to creating the above template, we must update the code so that it is fed from the HTML, receives the fields and can return a prediction. Thus, the app.py file would be updated:
1from flask import Flask, request, render_template
2from pickle import load
3
4app = Flask(__name__)
5model = load(open("/workspaces/flask-render-integration/models/decision_tree_classifier_default_42.sav", "rb"))
6class_dict = {
7    "0": "Iris setosa",
8    "1": "Iris versicolor",
9    "2": "Iris virginica"
10}
11
12@app.route("/", methods = ["GET", "POST"])
13def index():
14    if request.method == "POST":
15
16        val1 = float(request.form["val1"])
17        val2 = float(request.form["val2"])
18        val3 = float(request.form["val3"])
19        val4 = float(request.form["val4"])
20
21        data = [[val1, val2, val3, val4]]
22        prediction = str(model.predict(data)[0])
23        pred_class = class_dict[prediction]
24    else:
25        pred_class = None
26
27    return render_template("index.html", prediction = pred_class)
We have created the index function, which replaces the old hello_world and is fed by the values entered in the HTML to trigger the prediction process. This is because when the Predict button is clicked, a POST request is sent to the script and the values entered in the HTML form are read to perform the prediction.
Ultimately, the method returns the rendered HTML, in this case with the value of the prediction based on the values.
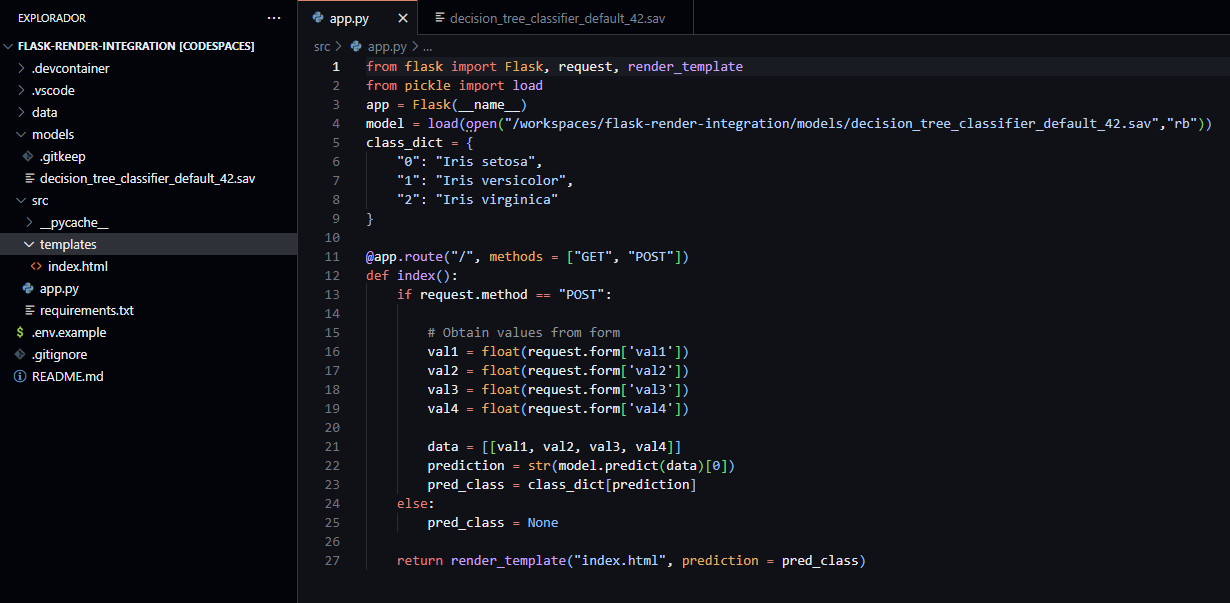
Right now, the repository looks like this:
If we save the changes and run the application again (gunicorn app:app), after navigating to our local web application we will see the following:
After filling in the values and clicking on Predict, the result is also displayed in the interface itself:
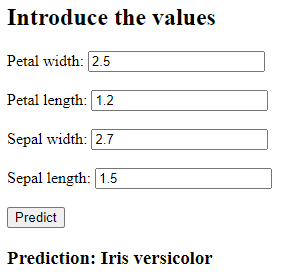
Entering any value predicts a class. Moreover, the effectiveness of the model is as observed in the past module.
The web interface seems very simple and unattractive to users. The next step is to give it some styling.
Step 5: Styling the application web interface
An easy way to add styles is to use CSS. We can add a <style> block directly above of the HTML to enhance it visually. The CSS code we will include is as follows:
1body {
2    font-family: Arial, sans-serif;
3    margin: 40px;
4    background-color: #f4f4f4;
5}
6form {
7    background-color: #fff;
8    padding: 20px;
9    border-radius: 8px;
10    box-shadow: 0px 0px 15px rgba(0,0,0,0.1);
11}
12input[type="number"] {
13    width: 100%;
14    padding: 10px;
15    margin: 10px 0;
16    border-radius: 4px;
17    border: 1px solid #ccc;
18}
19input[type="submit"] {
20    background-color: #333;
21    color: #fff;
22    padding: 10px 15px;
23    border: none;
24    border-radius: 4px;
25    cursor: pointer;
26}
27input[type="submit"]:hover {
28    background-color: #555;
29}
30h3 {
31    margin-top: 20px;
32    background-color: #fff;
33    padding: 10px;
34    border-radius: 4px;
35}
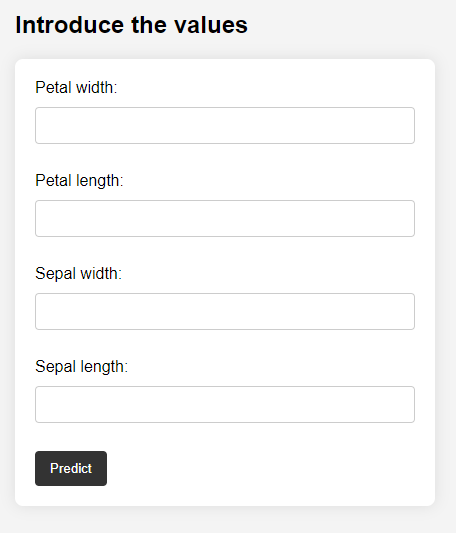
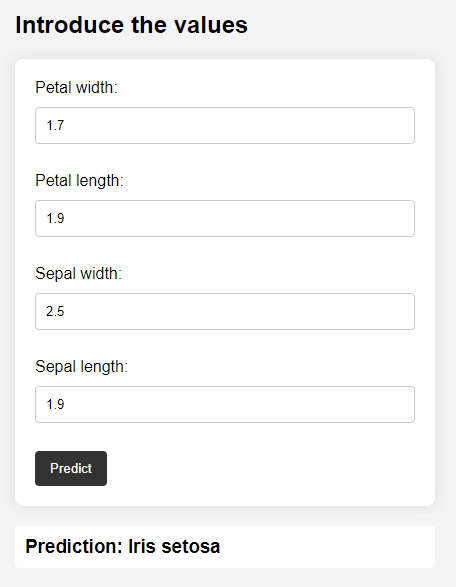
The above code sets a light background for the entire page and highlights the form and header with a white background and smoothly rounded edges. The input fields are more spacious and visual, with appropriate borders and padding, and the submit button features a color change when hovered over, providing visual feedback. In addition, more legible typography is used, and elements are appropriately spaced with margins to prevent them from feeling cramped.
When inserted into the HTML, the code would look like this:
1<!DOCTYPE html>
2<html>
3<head>
4    <title>Iris - Model prediction</title>
5    <style>
6        body {
7            font-family: Arial, sans-serif;
8            margin: 40px;
9            background-color: #f4f4f4;
10        }
11        form {
12            background-color: #fff;
13            padding: 20px;
14            border-radius: 8px;
15            box-shadow: 0px 0px 15px rgba(0,0,0,0.1);
16        }
17        input[type="number"] {
18            width: 100%;
19            padding: 10px;
20            margin: 10px 0;
21            border-radius: 4px;
22            border: 1px solid #ccc;
23        }
24        input[type="submit"] {
25            background-color: #333;
26            color: #fff;
27            padding: 10px 15px;
28            border: none;
29            border-radius: 4px;
30            cursor: pointer;
31        }
32        input[type="submit"]:hover {
33            background-color: #555;
34        }
35        h3 {
36            margin-top: 20px;
37            background-color: #fff;
38            padding: 10px;
39            border-radius: 4px;
40        }
41    </style>
42</head>
43<body>
44    <h2>Introduce the values</h2>
45
46    <form action="/" method="post">
47        Petal width: <input type="number" step="any" name="val1" required><br><br>
48        Petal length: <input type="number" step="any" name="val2" required><br><br>
49        Sepal width: <input type="number" step="any" name="val3" required><br><br>
50        Sepal length: <input type="number" step="any" name="val4" required><br><br>
51        <input type="submit" value="Predict">
52    </form>
53
54    {% if prediction != None %}
55        <h3>Prediction: {{ prediction }}</h3>
56    {% endif %}
57</body>
58</html>
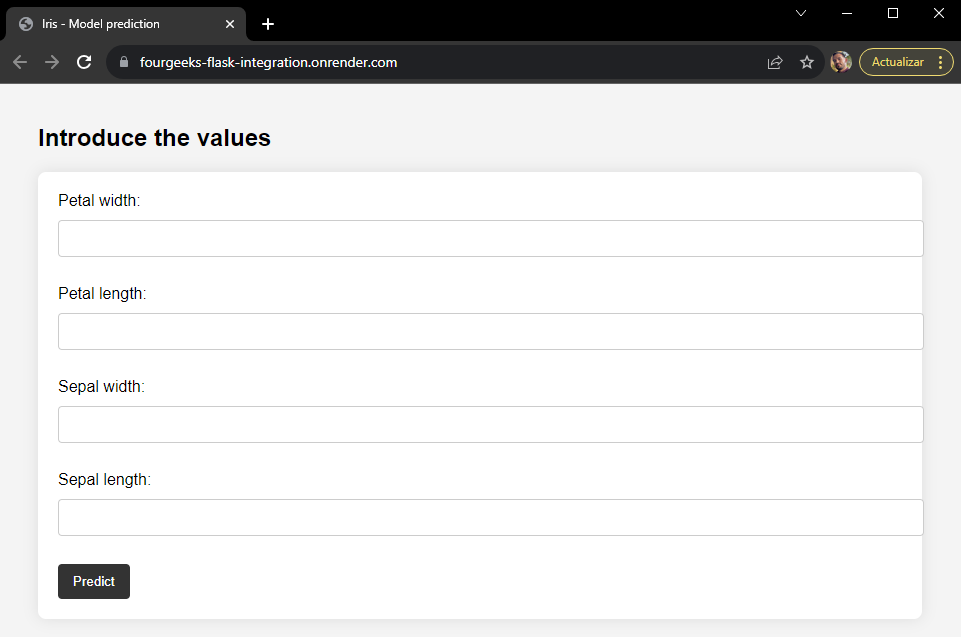
After re-running the application and accessing the web interface again, this is its new appearance:
And again, when filling in the values and launching the prediction, this is how it is displayed on the front end:
After developing the desired functionality and having a front end that meets our needs, we will integrate all this into Render.
Step 6: Create a service in Render and deploy the application
The last step is to configure the service in Render and connect it to our Git repository. We must go to the Render Dashboard, select the Web Services section, and choose the repository where we have uploaded all the code and the previous folders.
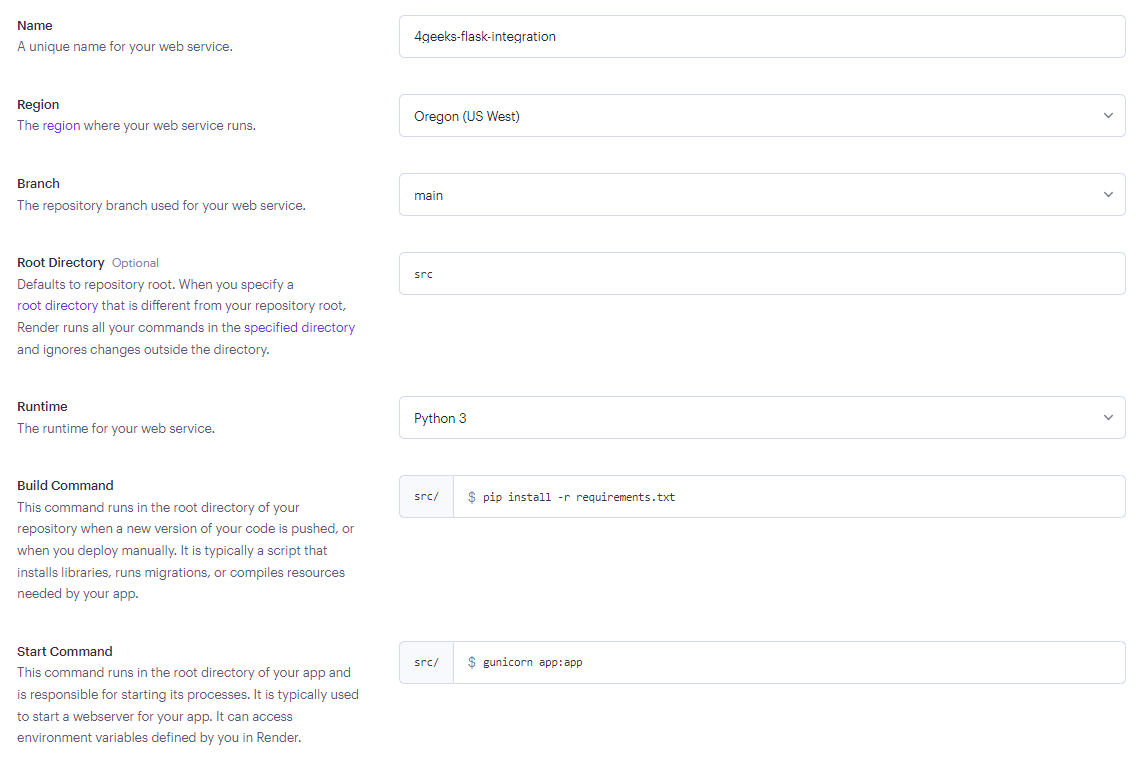
Once we select it, a form like the following one will appear:
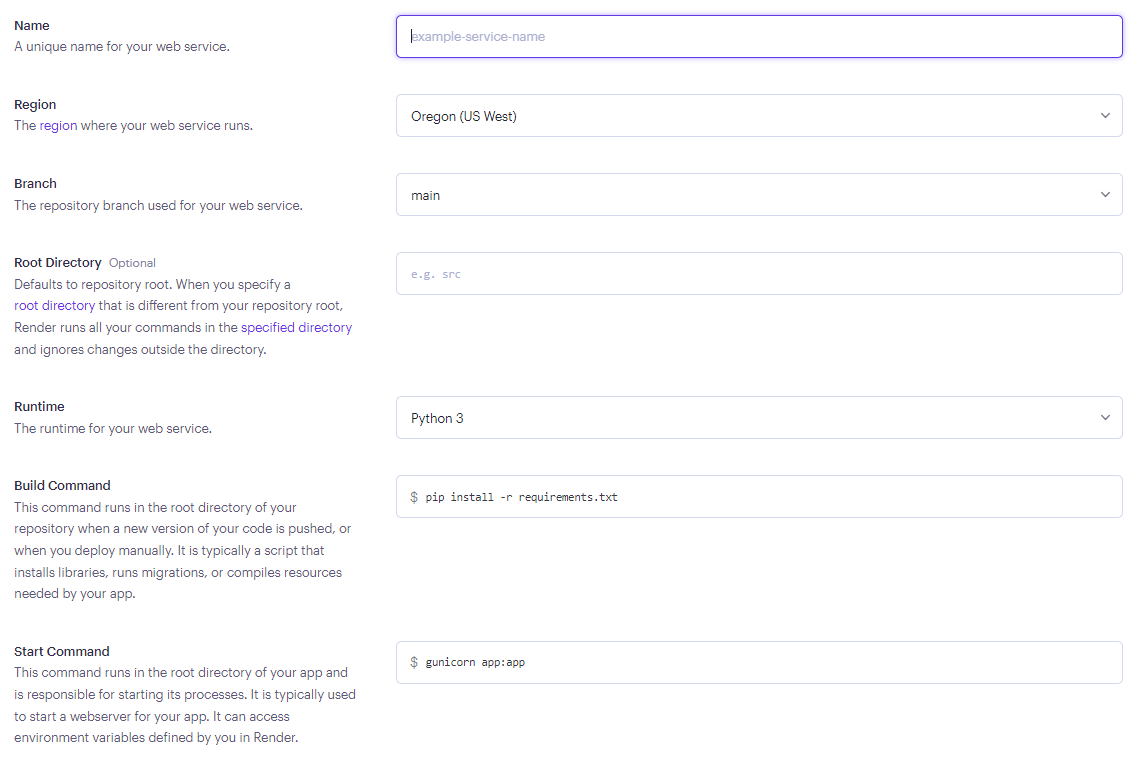
We will have to fill it with the following information:
Name: The name we want our service to have. In this case, we will introduce4geeks-flask-integration.Branch: The branch where our updated code is located, always in the latest version. We will have to leave the default value,main.Root Directory: In this case, we have developed the code inside thesrcfolder, which includes the Python script, the HTML template and the project libraries (filerequirements.txt), so we should entersrc.Runtime: The code is Python, so we will leave the default value,Python 3.Build Command: We will leave the default value,pip install -r requirements.txt.Start Command: We are already friendly with this command. We have used it in the development, so we will leave the default value,gunicorn app:app.
Finally, we will choose the free rate. The form, once filled in, should have the following information:
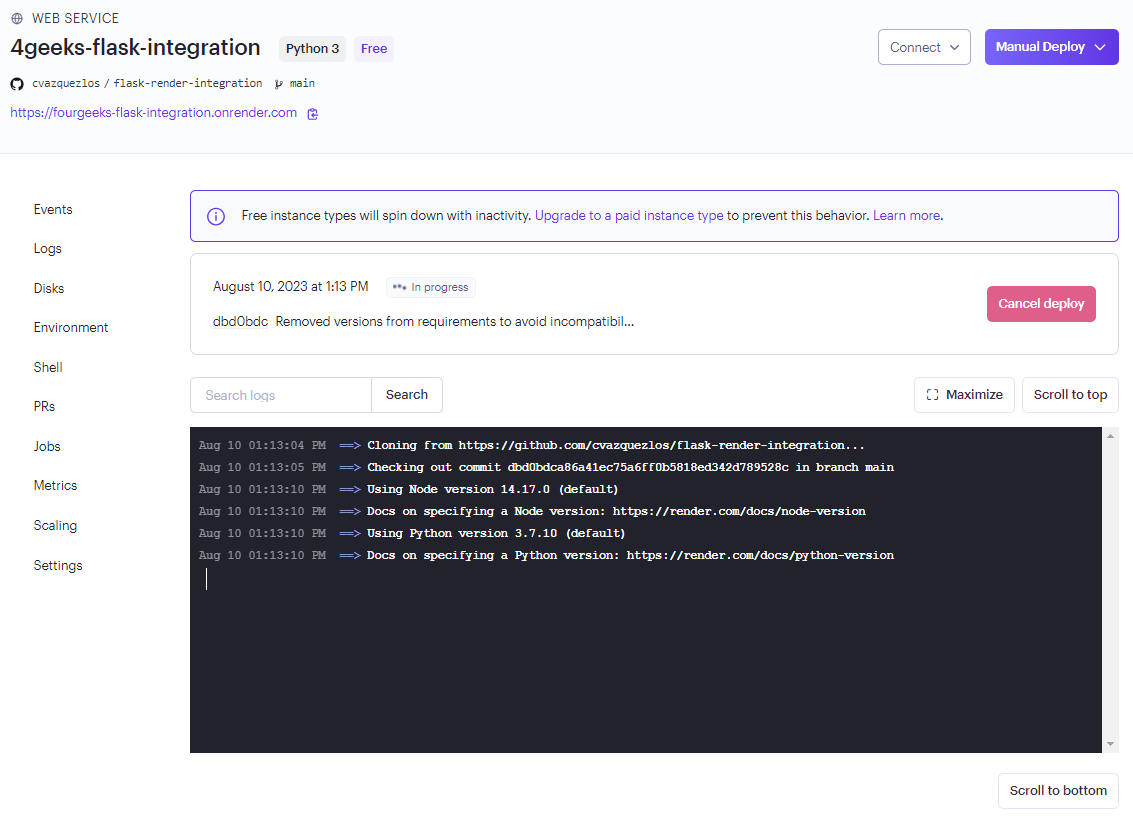
In the next step, we will see a console with the logs of the application deployment. The deployment is done step by step, first cloning the repository, building it, installing the dependencies, and, finally, executing the command to launch the web application.
Resolve the creation bug
Because the Render environment is different from our development environment (especially in the Python version, since 3.7 is used by default and in this case we use 3.10 and up), we may get an error in the build of the project. In this case, its resolution is very simple:
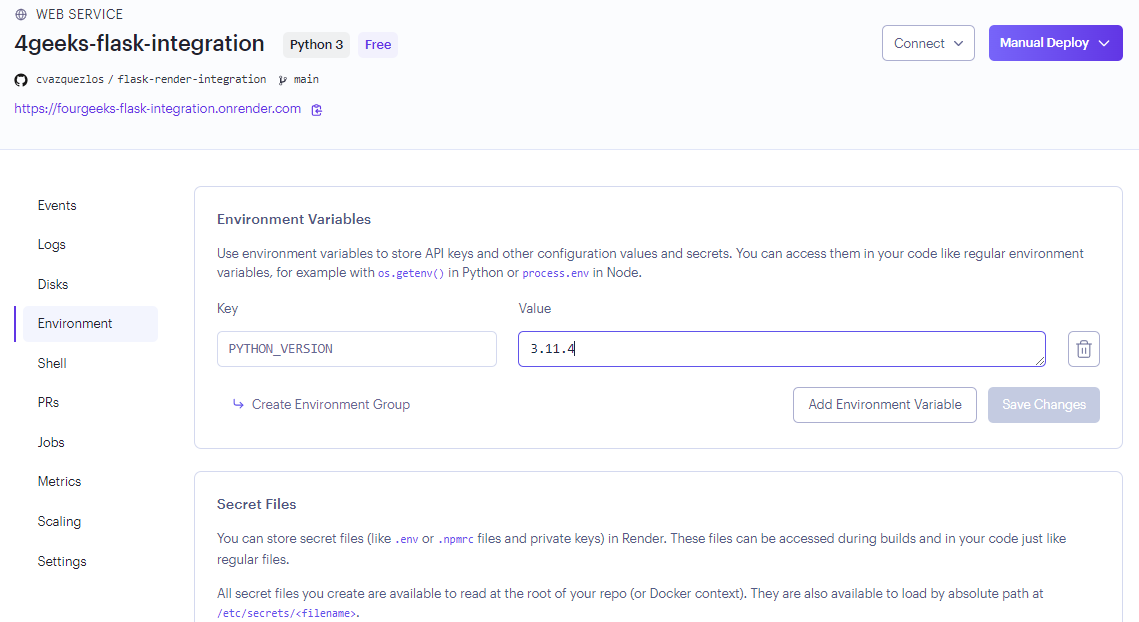
We have to access, in the same screen where the execution log is opened, to the Environment section and enter a new environment variable. In this case, we have the 3.11.4 version of Python, but you could enter any other (as long as it is from 3.7).
We re-launch the deployment and now it should work.
Once the deployment has been successful, this is the log that will be displayed:
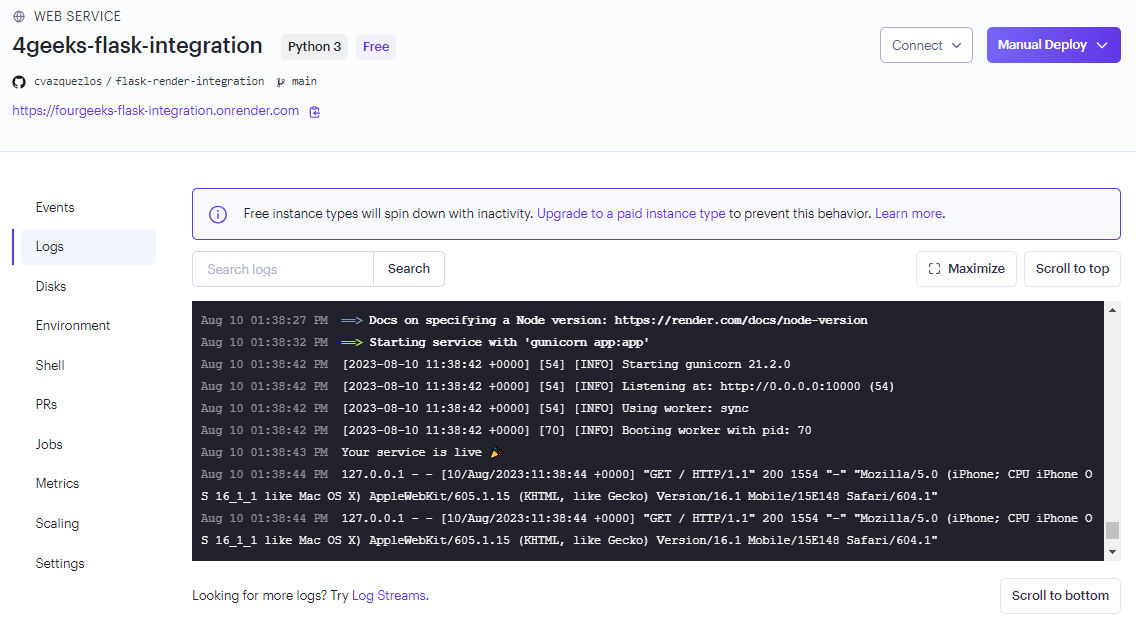
In fact, a section is available in which we can visualize the different deployments of our web application and the status of each one of them:

Step 7: Using the service in Render
Once the deployment has been successful, we access the application from the link just below the name of the service, and we can now use the application and share it with our friends/colleagues/clients. The one we have created in this lesson is accessible at the following link: https://fourgeeks-flask-integration.onrender.com/.
Note: As you have used the free plan, Render may throw the application away if it is not used. Depending on when you read this, the application will be operational or not.