Cookicutter
Creating a Project Structure
Has it happened to you that every time you want to create a new project you copy the entire folder of a previous project with the same set of code and then start replacing variables, renaming folders and manually changing their code inputs, hoping to not forget anything on the way. This is a pretty tedious and repetitive task. Not to mention that it’s prone to errors. That is why we want to introduce to you an awesome tool: Cookiecutter!
Cookiecutter
Cookiecutter is a powerful tool! This is an incredible way to create a project template for a type of analysis that you know you will need to repeat a number of times, while inputting the necessary data and/or parameters just once.
What is cookiecutter?
Projects can be python packages, web applications, machine learning apps with complex workflows or anything you can think of Templates are what cookiecutter uses to create projects. What cookiecutter does is quite simple: it clones a directory and put it inside your new project. It then replaces all the names that are between {{ and }} (Jinja2 syntax) with names that it finds in the cookiecutter.json file. The best part is that it also has a specific template for data science and machine learning projects. (We’ll see an example of how to build a cookiecutter template)
Cookiecutter must be part of your environment if you want to use it.
You can install it with pip:
pip install cookiecutter
or if you are using Anaconda:
conda config --add channels conda-forge
conda install cookiecutter
Already installed! Now you can use cookiecutter to create new templates for projects and papers!
Gitpod
Now that you have a very well structured project, you probably have already uploaded to your GitHub account.
The best way to configure Gitpod is by using Gitpod. In a browser, navigate to your project’s GitHub, GitLab or Bitbucket page.
In the browser’s address bar, prefix the entire URL with gitpod.io/# and press Enter.
For example, gitpod.io/#https://github.com/gitpod-io/website
We recommend you install the Gitpod browser extension to make this a one-click operation.
Open in Gitpod button
To make it easy for anyone to start a Gitpod workspace based on your project, we recommend you add an “Open in Gitpod” button to your README.md.
Add your .gitpod.yml file to an existing Github repo
For any web app you’re going to most likely have some kind of install and run commands which then servers to a port. For example, this is the contents of a .gitpod.yml file for a Nuxt app using yarn:
tasks:
  - init: yarn install
    command: yarn dev
ports:
  - port: 3000
    onOpen: open-preview
When the container spins up it will install dependencies and then serve to port 3000. It will also open a preview of the app when the app is ready.
Add your .gitpod.Dockerfile (optional)
By default it Gitpod uses a generalized Dockerfile, but you can specify your own by creating this file and customize it to your liking.
Go to your Github repo url and prefix with #gitpod.io
That’s it!!
Some additional benefits from using Gitpod:
- Forget Expensive Laptops and Operating Systems
Eliminate the need to buy an expensive laptop with a bunch of computing power and who cares what OS you have. You could have a $200 Chromebook, or use a public computer at the local library, and do the same development you would on a MacBook Pro. As long as it can run a browser, you’re good.
Machine Learning people already know this. They run Jupyter notebooks in the cloud on GPUs, instead of spending thousands and all the headaches of doing it themselves.
- Eliminate Onboarding Headaches
If you want to know more on how to supercharge the experience with Gitpod for your project, you can go to the following guide: https://www.gitpod.io/docs/getting-started
Understanding cookiecutter with a Streamlit project
Streamlit is a Python library designed to build web applications. It’s very simple to use and provides a lot of functionalities that let you share experiments and results with your team and prototype machine learning apps.
Let's look at this Streamlit common project structure from a machine learning engineer:
src folder that contains
the main script of the app(app.py)
utils module that contains two scripts:
ui.py to put the layout functions
common.py to hold other utility functions for data processing or remote database connections (among other things)
.gitignore file to prevent git from versioning unnecessary files (such as .env files, or .pyc files)
Procfile and setup.sh : to handle the deployment on Heroku
requirements.txt : to list the project dependencies
.env file to store the environment variables of the project
README.md to share details about the project
We are going to create a cookiecutter template from scratch that matches the previous target structure. This way we will understand how it works.
Let’s start by creating a folder for this template.
mkdir streamlit-cookiecutter
cd streamlit-cookiecutter
Inside this folder, create a cookiecutter.json file that contains the following information:
{
  "project_name": "my streamlit app",
  "repo_name": "{{ cookiecutter.project_name.lower().replace(' ', '_') }}",
  "author_name": "Ahmed BESBES",
  "description": "A short description of the project.",
  "open_source_license": ["MIT", "BSD-3-Clause", "No license file"],
  "s3_bucket": "",
  "aws_profile": "default",
  "python_interpreter": ["python3", "python"],
  "host": "localhost",
  "port": 8501,
  "api_key": "XXXXXXXXXXXX"
}
Why are we creating this file?
The cookiecutter.json file includes keys and values. The values of the items are set in order. For example, the repo_name is set after the project_name (since its value depends on project_name‘s value). Setting the values of these items happens when we clone the template using cookiecutter, because cookiecutter will ask for them.
Now let's create the folder and put the desired target structure in it. We’ll name this folder based on the repo_name item. In cookiecutter syntax: {{cookiecutter.repo_name}}.
Each of these files can access the values of the items we pass to cookiecutter: all we have to do is use {{ and }}. This will be useful to generate the README.md, setting environment variables and deduplicate code automatically.
README.md
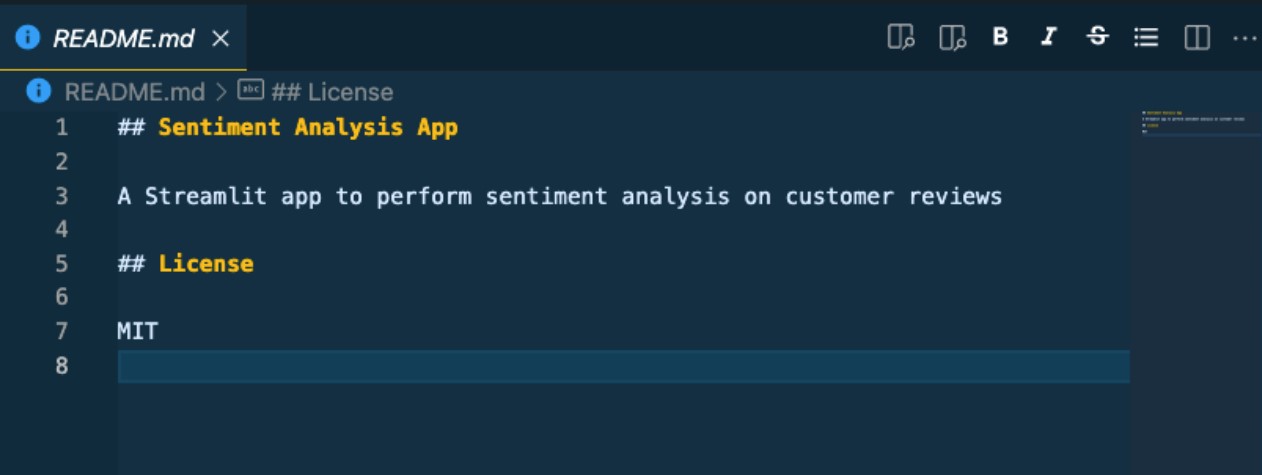
We can automatically generate the README.md by inserting the items project_name , description , open_source_license in it.

Set environment variables
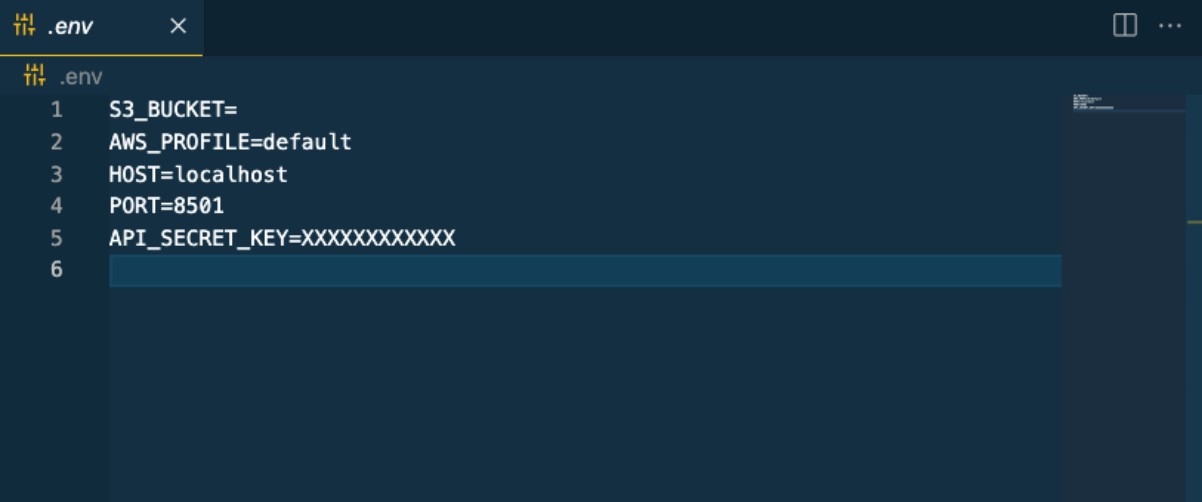
We can automatically fill in the values of s3_bucket , aws_profile,port , host and api_key inside the .env file

Deduplicate code
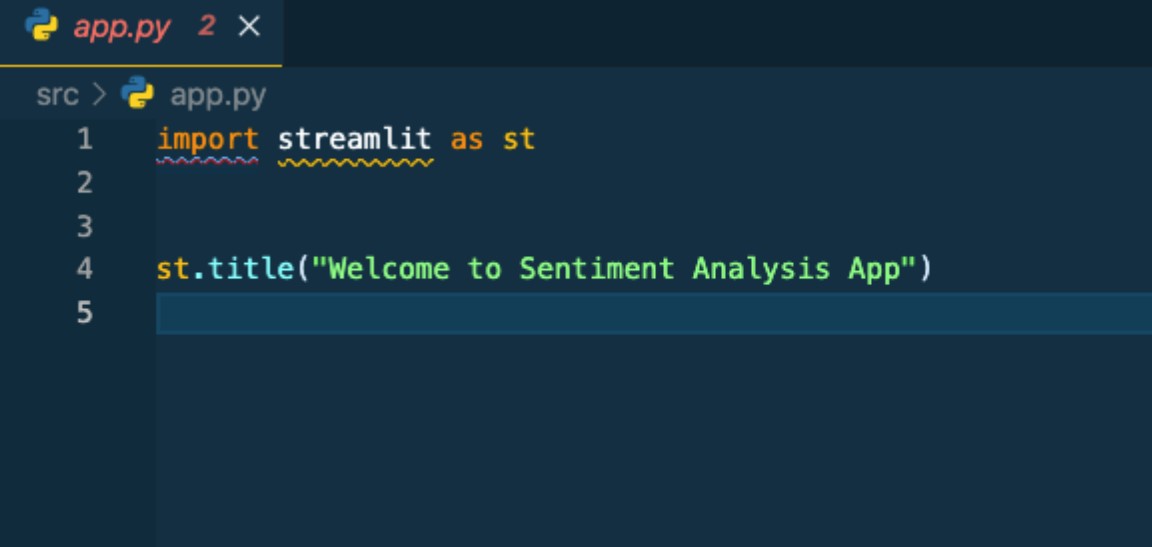
If our Streamlit apps follow the same structure and all start with the name of the project as the title, there’s no need to repeat this code every time.

Once done with the template’s code, we can push it to Github, and anyone who liked our structure can use it to start a project.
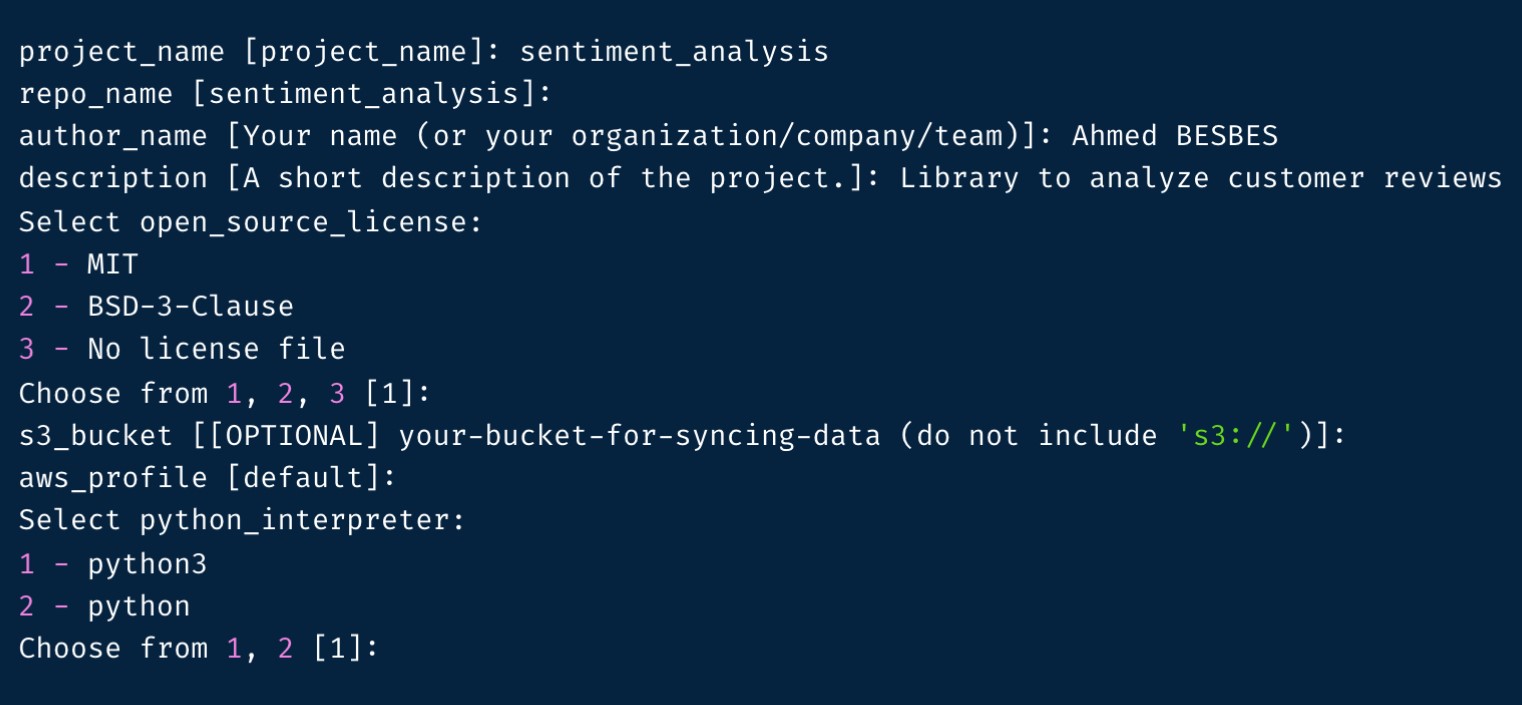
Let's say we want to create a sentiment analysis app in Streamlit. We create an empty folder and open the terminal inside our folder, all we need to do is call cookiecutter with the URL of the template.
Example: cookiecutter git@github.com:maria/streamlit-cookiecutter.git
Once we execute this command, Cookiecutter will ask to set the values of the items defined in the cookiecutter.json file (notice that the default value of each item is put between brackets).

Let's see how files have been populated:


Good practices to include in your projects
-Keep secrets and configuration out of version control**
You really don't want to leak your Twitter secret key or database username and password on Github. Here's one way to do this, by storing your secrets and config variables in a special file (You learned it in the Cookiecutter template)
Create a .env file in the project root folder. Thanks to the .gitignore, this file should never get committed into the version control repository. Here's an example:
# example .env file
DATABASE_URL=postgres://username:password@localhost:5432/dbname
AWS_ACCESS_KEY=myaccesskey
AWS_SECRET_ACCESS_KEY=mysecretkey
OTHER_VARIABLE=something
- Using a package to load these variables automatically
There is a package called python-dotenv to load up all the entries in this file as environment variables so they are accessible with os.environ.get. Here's an example snippet adapted from the python-dotenv documentation applied in the cookiecutter data science template:
# src/data/dotenv_example.py
import os
from dotenv import load_dotenv, find_dotenv

# find .env automatically by walking up directories until it's found
dotenv_path = find_dotenv()

# load up the entries as environment variables
load_dotenv(dotenv_path)

database_url = os.environ.get("DATABASE_URL")
other_variable = os.environ.get("OTHER_VARIABLE")
We have seen how to work with cookicutter on a common streamlit project. But Cookiecutter has a lot of templates for different project types, so as you can imagine, Data Science is not the exception.
Use the Cookiecutter Data Science open-source template to kickstart data science projects that follow the best standards in the industry.
To start a new data science new project, you can open the terminal in your project folder and type:
cookiecutter https://github.com/drivendata/cookiecutter-data-science
That's it!! Now you can see an entire structure of very organized, readable and reusable structure. Take some time to explore how is it structured.
Build from the environment up
The first step in reproducing an analysis is always reproducing the computational environment it was run in. You need the same tools, the same libraries, and the same versions to make everything play nicely together.
One effective approach to this is use virtualenv. By listing all of your requirements in the repository (a requirements.txt file is included) you can easily track the packages needed to recreate the analysis. Here is a good workflow:
Run mkvirtualenv when creating a new project
pip install the packages that your analysis needs
Run pip freeze > requirements.txt to pin the exact package versions used to recreate the analysis
If you find you need to install another package, run pip freeze > requirements.txt again and commit the changes to version control.
Any person wanting to use your project will just need to write the following command in order to have your same dependencies:
pip install -r requirements.txt
It is a good practice to execute the previous command every time you are about to start editing a project.
For reference, we'll leave the documentation for cookiecutter-data-science in the following link: